Collections & Activities
Last updated: August 16, 2026
Summary
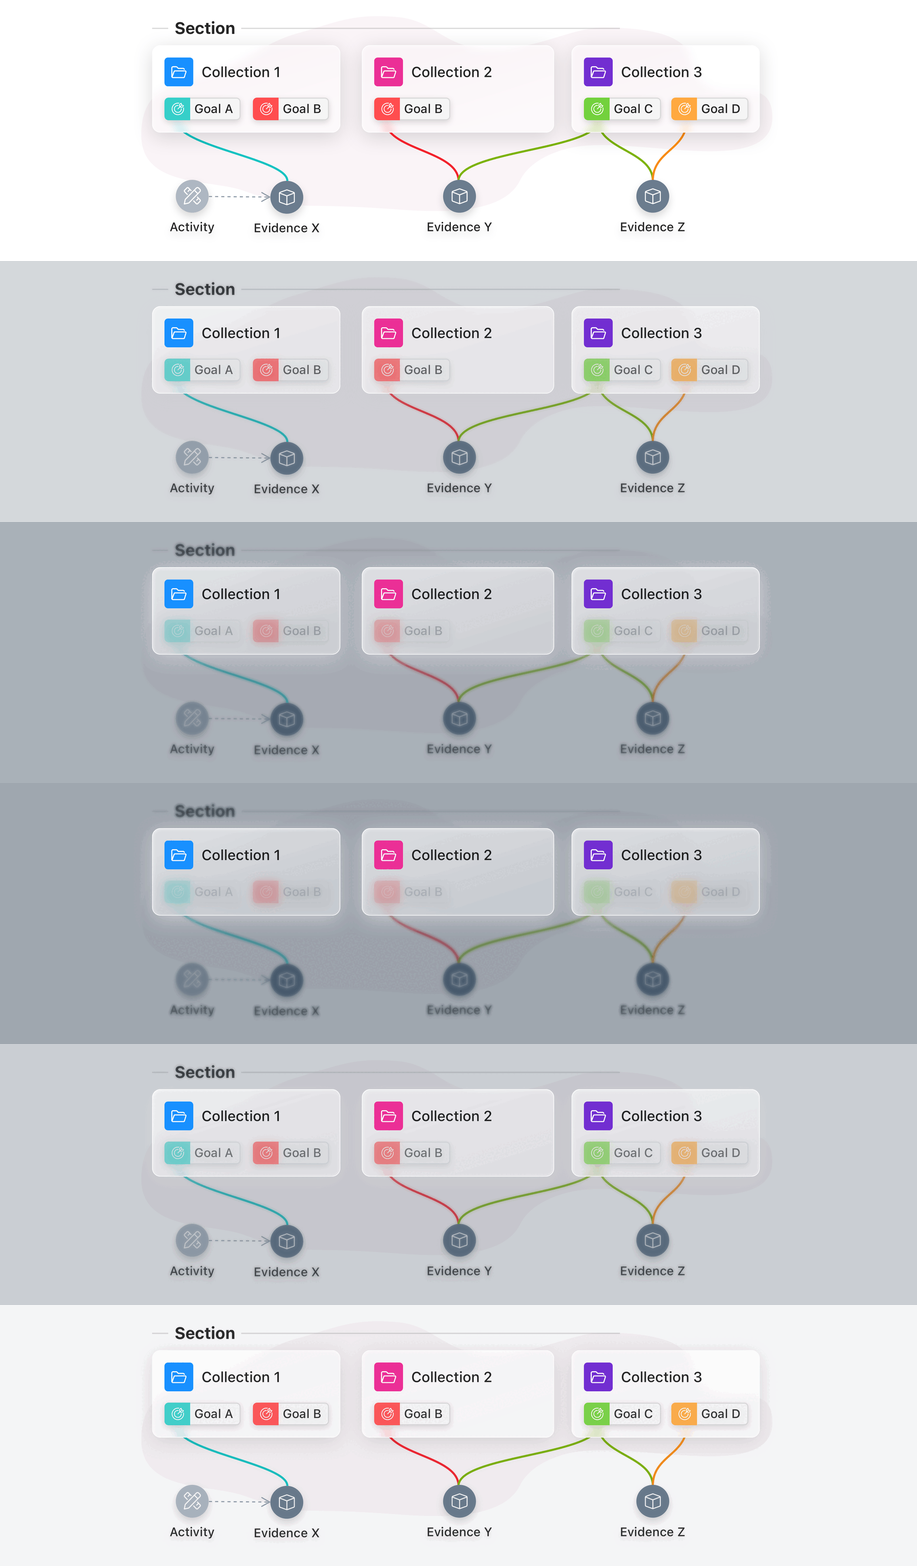
Collections are used to organise Evidence within the Portfolio. They form one of the two main dimensions into the learning journey, next to Goals (see 📄 Goals & Sub-Goals). Collections typically refer to the learning contexts (e.g. units, modules, courses, projects, internships, jobs, etc). They can also represent other bundles of Evidence.
Activities are chronologically ordered sets of learning experiences, both planned in the future and past Activities that have Evidence attached. Planned Activities serve as placeholders for where the learner can add Evidence.
Collections
What are Collections?
Collections are the way to organise the Portfolio with and are used to bundle related Evidence. They are intended to represent the various learning contexts within the learning journey, such as units, courses, modules, projects, and internships. Newer Collections are placed on top, while older Collections gradually move downward during the learning journey.
Learners can add Collections themselves, or they can be imported from a Template that is defined by a teacher or learning designer, see 📄 Templates. Collections can have a Name, Subtitle, Description, and Colour and they can be grouped in Sections (see 📄 Sections).
When creating a Snapshot of a selection of the Portfolio (for assessment or showcasing purposes), the learner decides which Collections to include that are relevant for that purpose.
Collections can also be hidden in the live Portfolio by the learner, this hides the Collection and its contents from any other user or visitor of their Portfolio. This can be useful for archiving Collections that are no longer relevant, but when you want to keep their contents.
How to create a Collection?
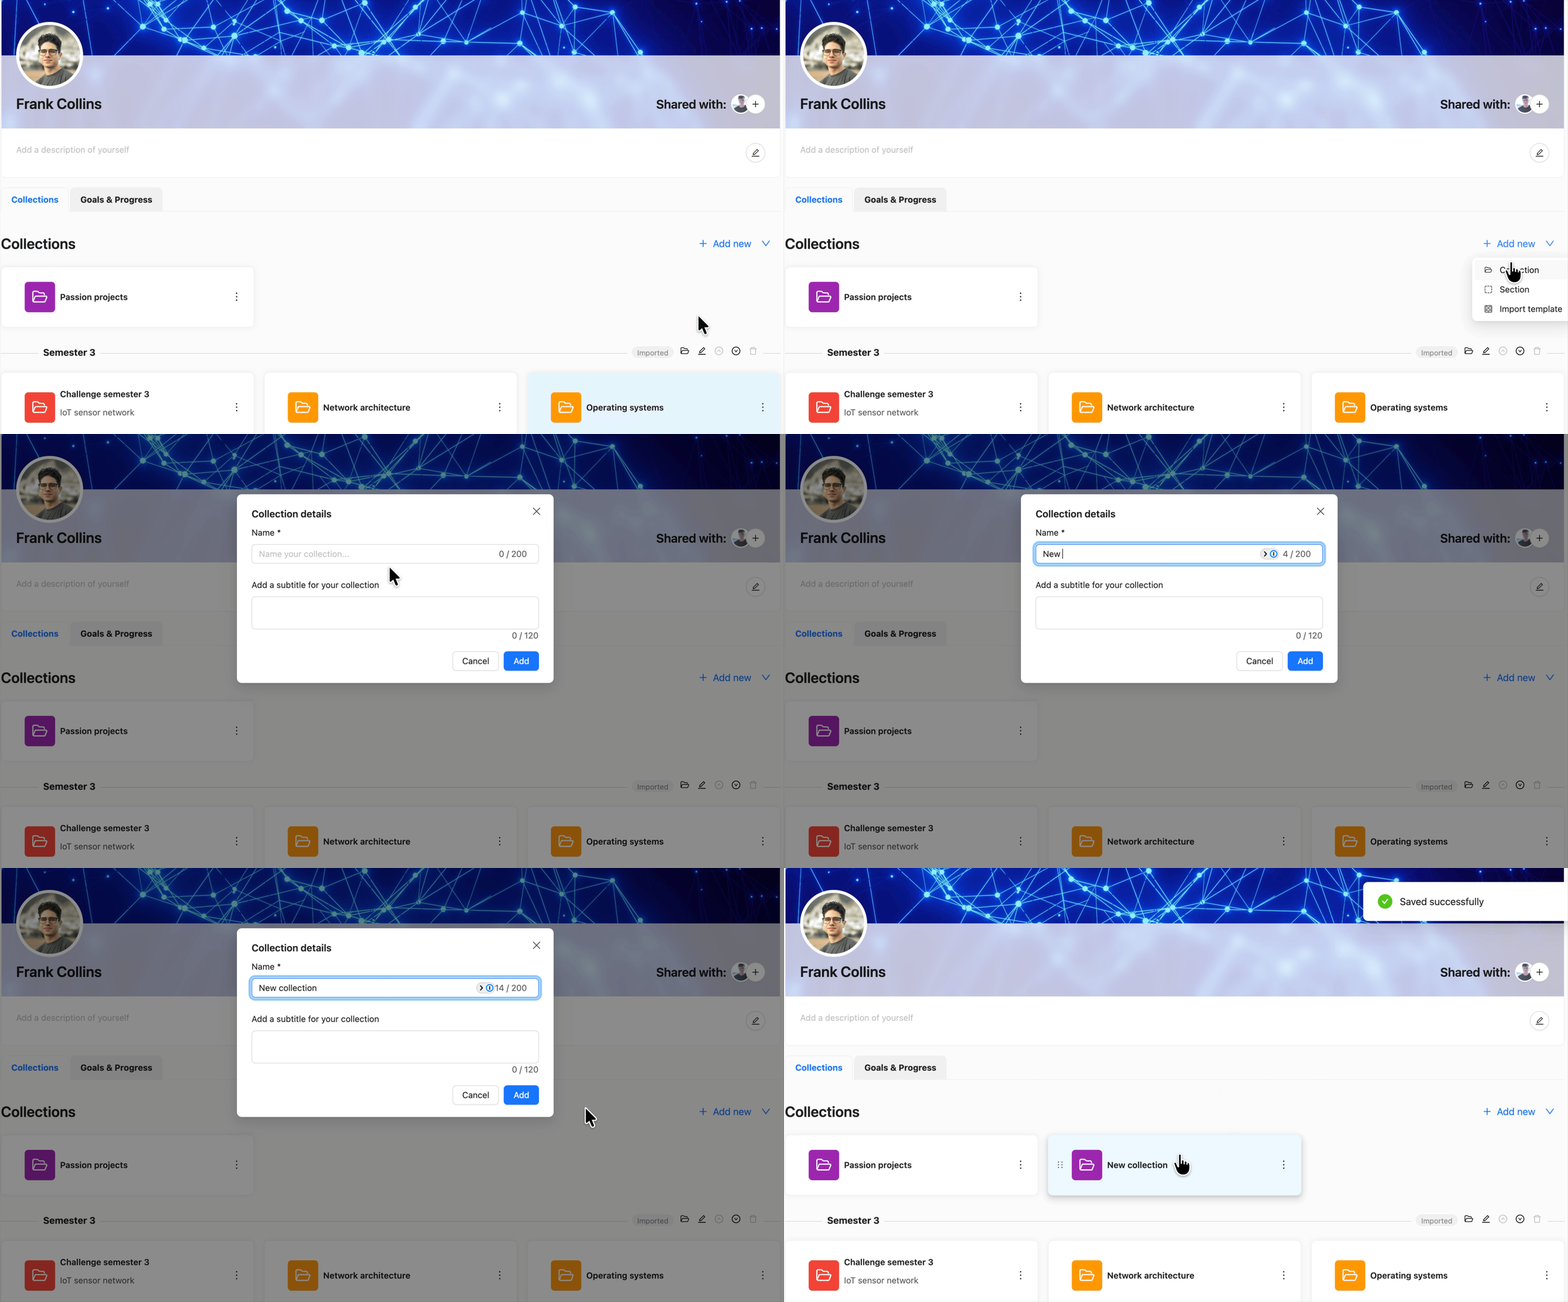
As a learner, you can create a new Collection from the Portflow home page on the Collections tab.
Click + Add new
Select Collection
Give the Collection a Name (required) and optionally a Subtitle
Click Add
How to customise Collections?
As a learner, you have various options to customise Collections, like its name, colour, banner image and placement.
On the Portflow home page (Collection tab), it is possible to:
Change the name and subtitle of the Collections, hide the Collection or delete the Collection
Click the Action menu (︙)
Click Rename / Hide / Delete
Note: You can delete a Collection, even if it contains Evidence. This Evidence can still be found within the ‘My evidence’ page and in any other Collections it was added to.
Note: By deleting a Collection, you will permanently delete its description and all Collection Feedback.
Deleting a Collection is a permanent action. It cannot be undone.
Move a Collection (to a (different) section)
Click and hold the six dots on the left side of the Collection folder (⋮⋮)
Drag the Collection to the new spot
Alternatively, use the move buttons in the Action menu (︙).
Adjust the colour of the Collection
Click the folder icon of the Collection
Choose the desired colour for the Collection
On a Collection page, it is possible to:
Add or edit a description
Click the pencil icon in the Collection description box (you might need to expand the description box first).
Edit the name of the Collection / hide the Collection / share the Collection / delete the Collection
Click the Action menu (︙)
Click Edit / Hide / Share / Delete
Add a Banner image
Click the Action menu (︙)
Click Add collection banner
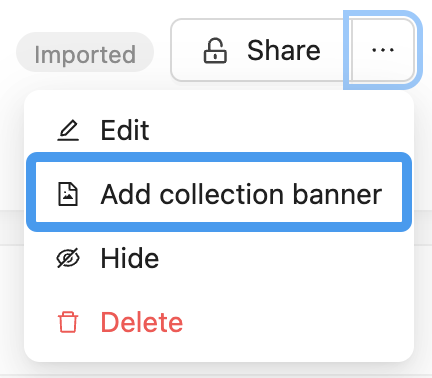
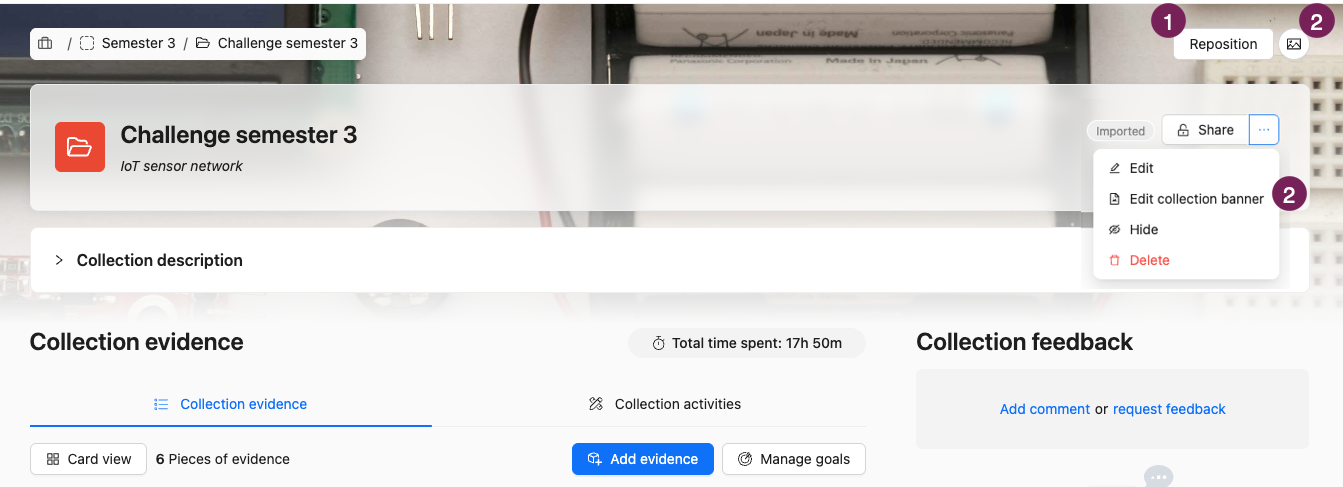
Choose an image. If desired, you can reposition the image.
Reposition the banner image (1) / Edit the banner image (2)
Hover over the image and click Reposition / click the three dots and choose Edit collection banner
Reposition or edit the image as desired
Save the image
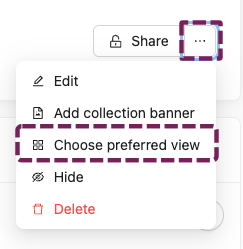
Change the Default view
There are two main views of the Evidence within your Collection: Collection Evidence or Collection Activities. Which of these two is the default for you, in all Collections you view, can be changed in your User Settings, see 📄 User Settings.
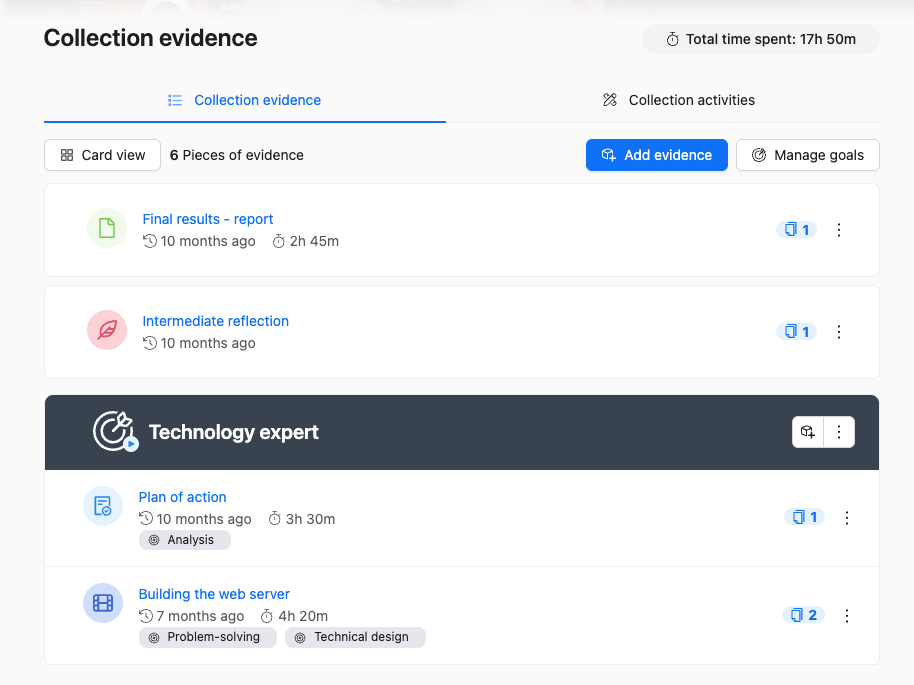
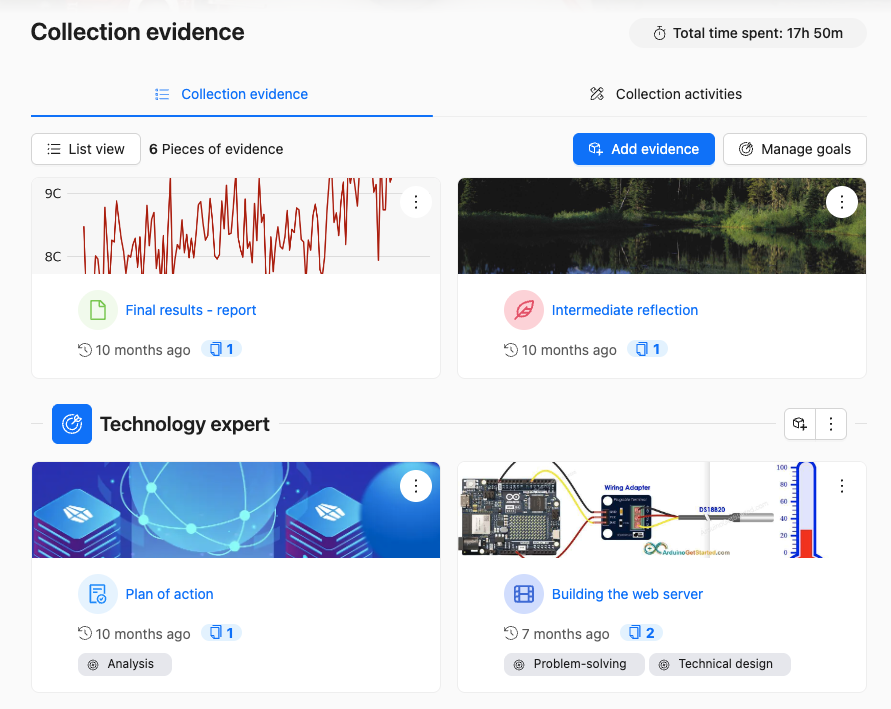
Within the Evidence overview, there are 2 different views: List View or Card View. Use the button to switch between the two views (1).

Which of the Evidence views (List or Card view) is the default for this Collection (for everyone visiting it) can be set up in the Collection options.
Set up Evidence card images
Once you have selected the Card view, you can add an Evidence card image for each Evidence.
Click the Action menu (︙) on an Evidence card and select Add evidence card image. You can upload any image of type PNG, JPG, or JPEG with a file size limit of 10 MB. The image is dynamically cropped based on the current screen size, based on your initial selection.
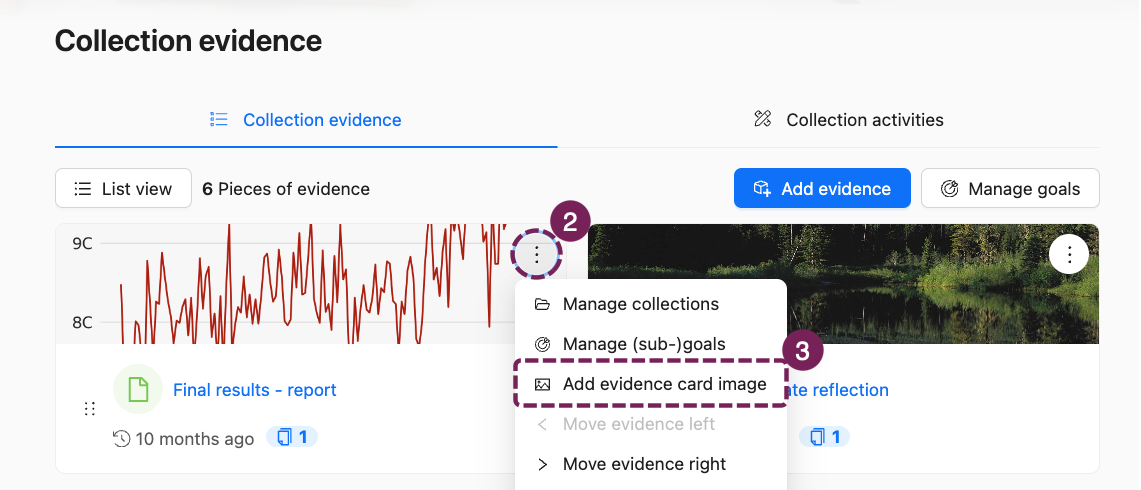
Note: The selected Evidence card image applies to this Evidence for all Collections this Evidence is in.
Activities
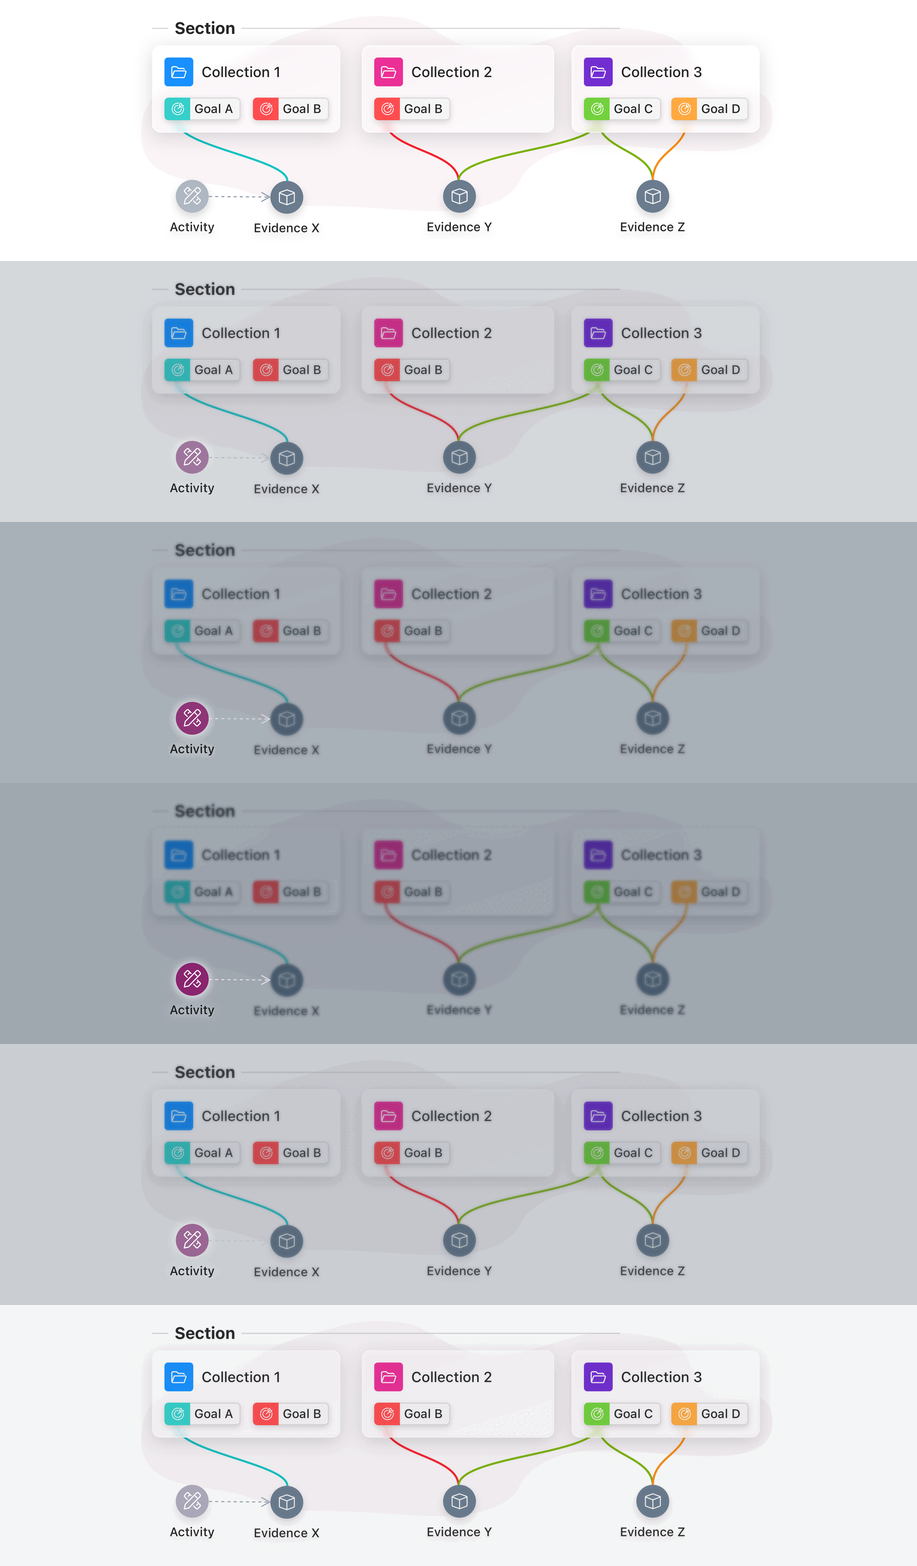
What are Activities?
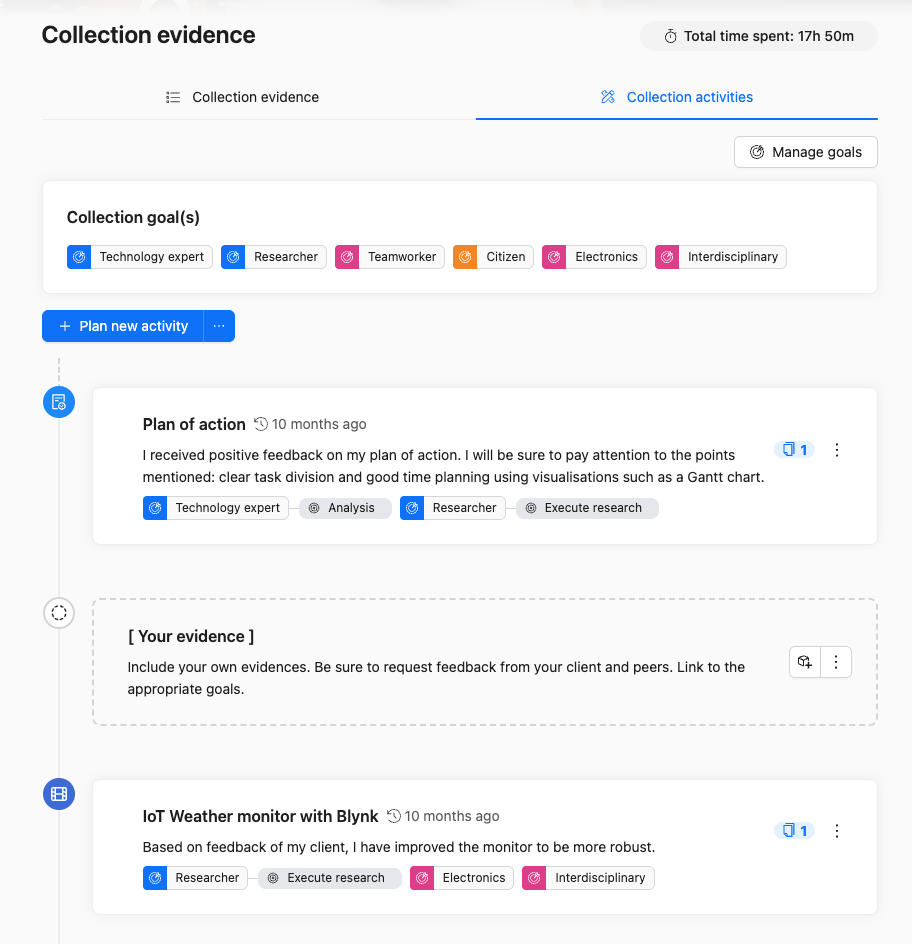
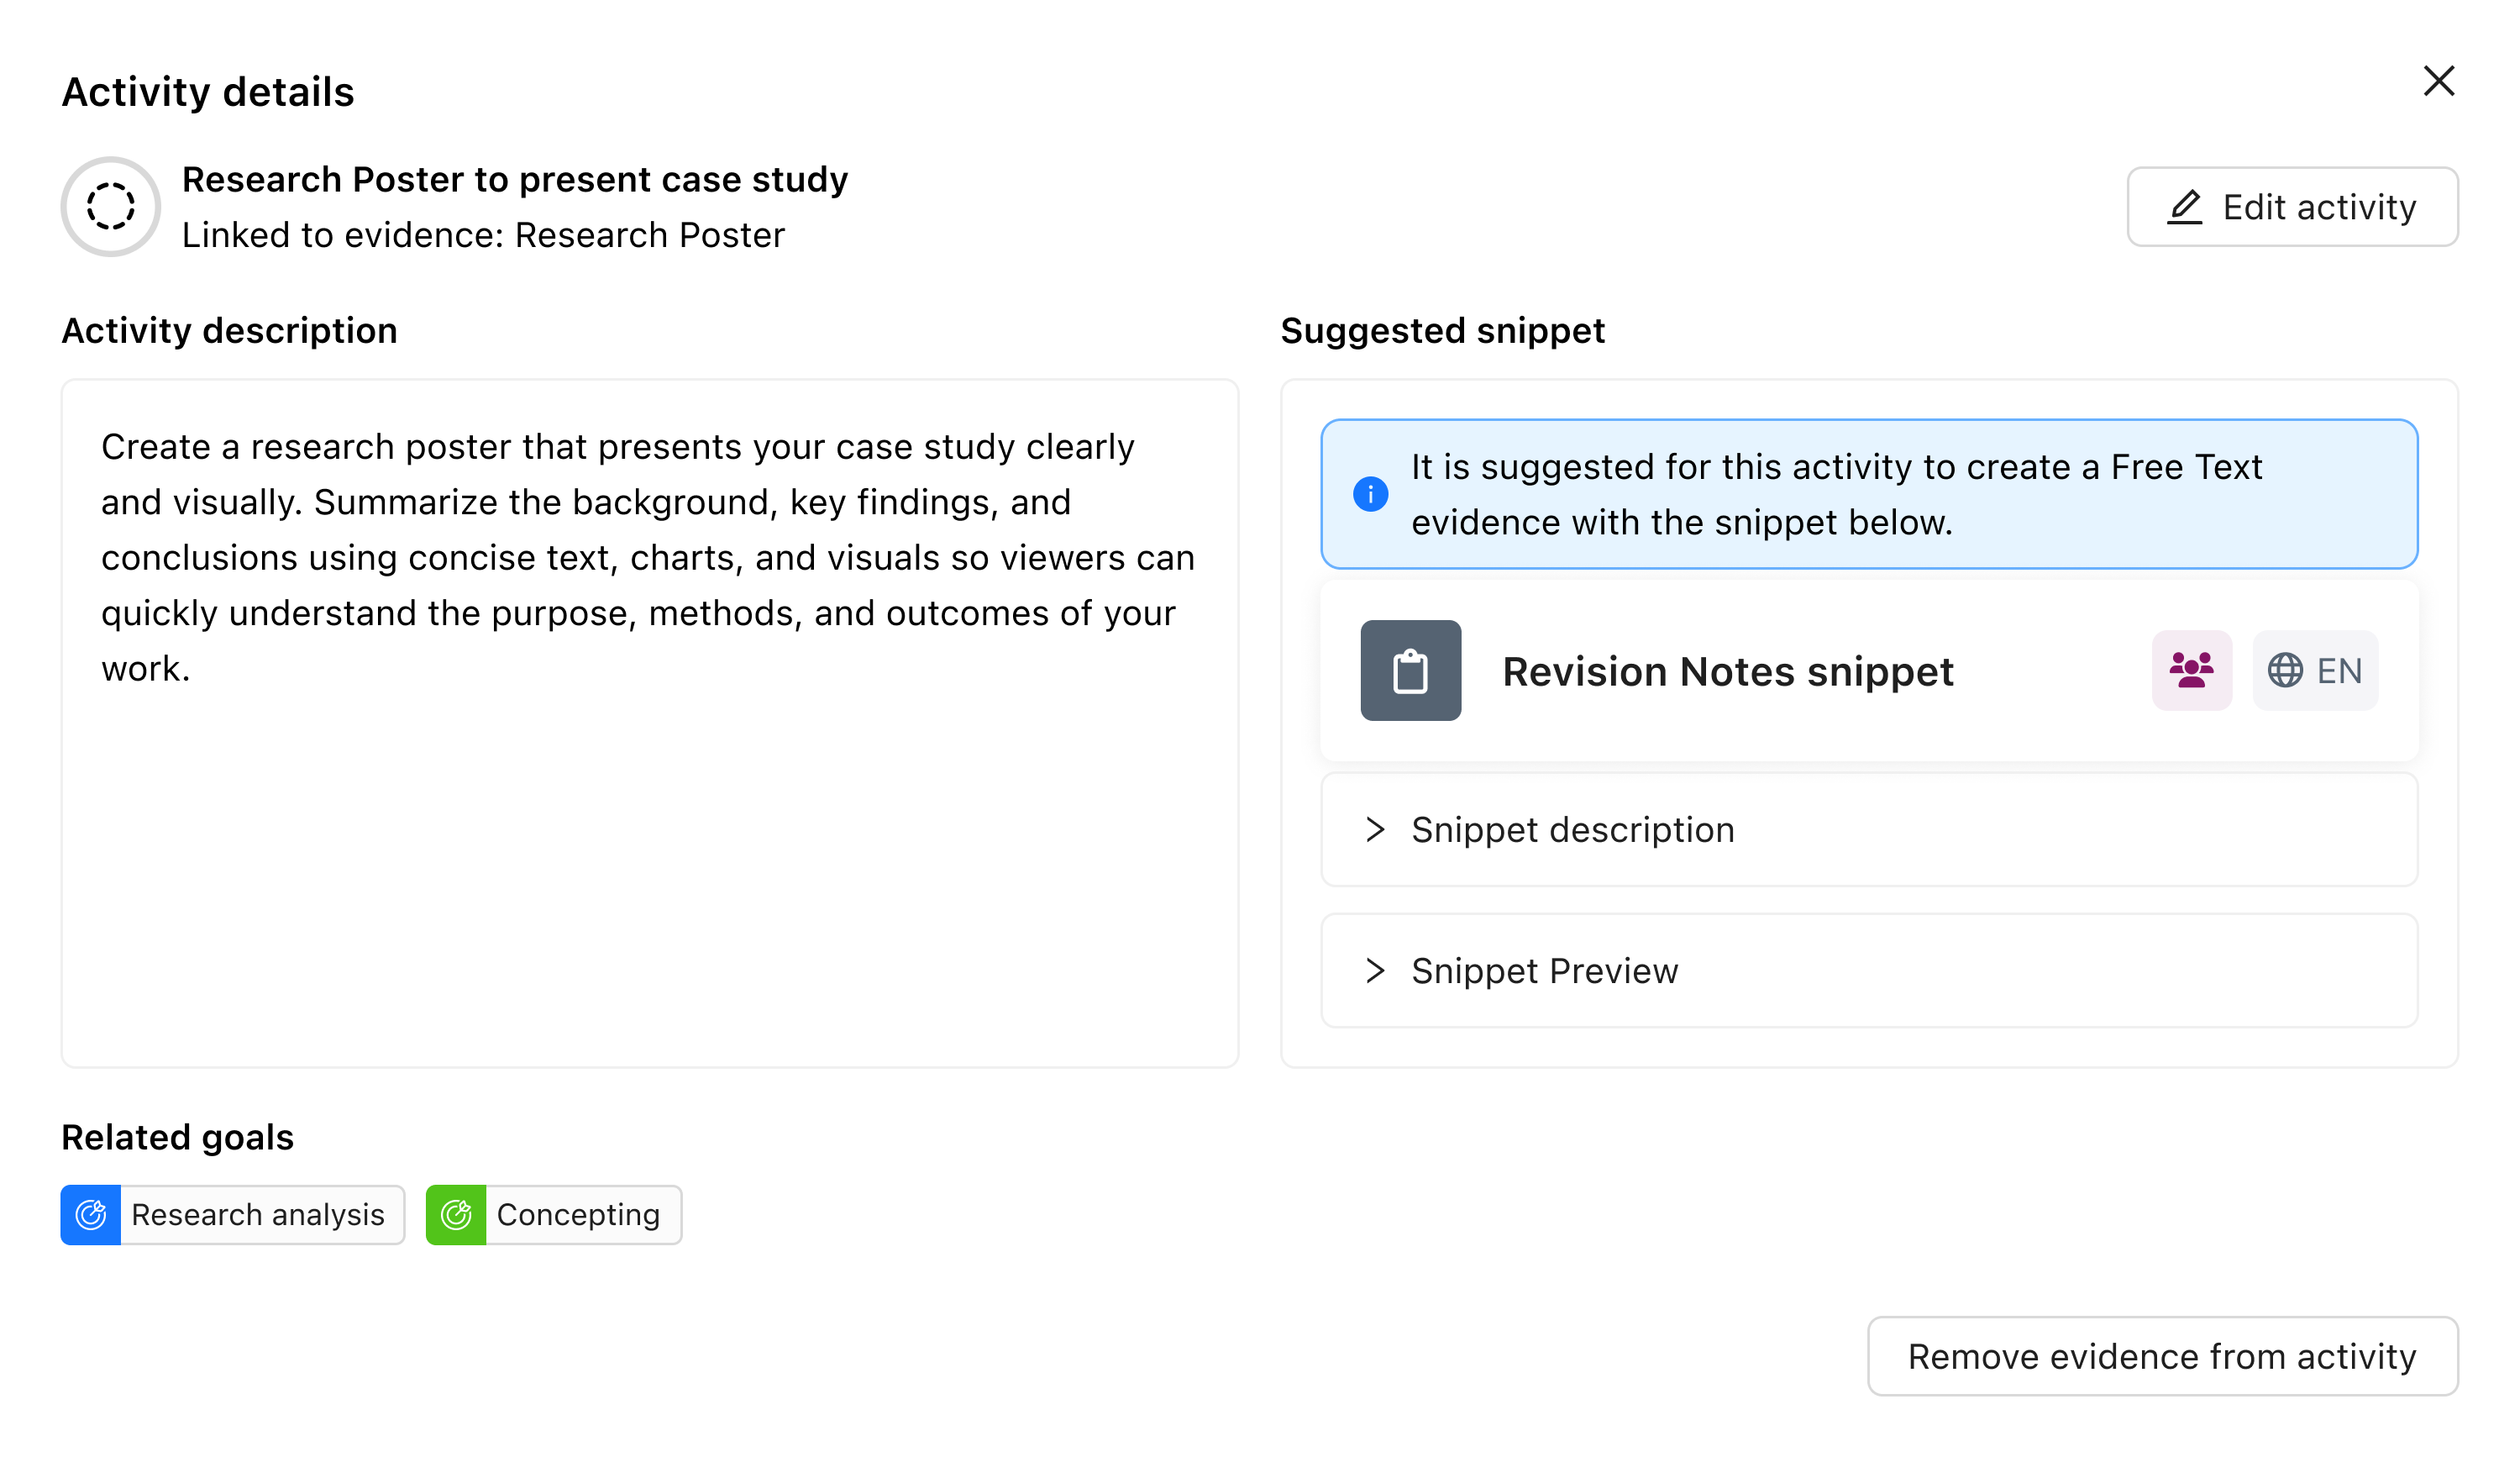
Activities are chronologically ordered sets of learning experiences within a Collection. They can represent future planned Activities as well as past Activities that have Evidence attached. Activities can contain a title, description, associated Goals and a suggested Snippet (template for Evidence). Activities can be imported using a Template or created by the learner. Planned activities serve as 'placeholders' for Evidence. Deleting an Activity is only possible when no Evidence is linked to it.
Once a learner has attached new Evidence, existing Evidence, or Evidence based on a Snippet, it is no longer an empty (planned) activity. The name and description of the Evidence and the Activity will match. You can view the information from the original Activity by clicking the Action menu (︙) on an Activity.
What is the difference between the Collection views?
Evidence View: List View | Evidence view: Card View | Activity View |
All Evidence in this Collection is visible | All Evidence in this Collection is visible | Evidence not associated with an Activity is not visible. |
Evidence is organised by Goal. Evidence that is linked to multiple Goals is displayed multiple times. | Evidence is organised by Goal. Evidence that is linked to multiple Goals is displayed multiple times. | Evidence is (chronologically) organised by Activity. Evidence that is linked to multiple Goals is displayed 1 time, with all linked Goals displayed as labels. |
Title, upload date, quantity of versions, associated Sub-Goals and the order of Evidence within the Goal are displayed. | Title, upload date, quantity of versions, associated Sub-Goals and the order of Evidence within the Goal are displayed. | Title, upload date, quantity of versions, associated Goals and the order of Activities are displayed. |
From this view, you can add Evidence immediately. You can choose to immediately add it to a Goal. It will not immediately be added to an Activity. | From this view, you can add Evidence immediately. You can choose to immediately add it to a Goal. It will not immediately be added to an Activity. | You can either add an Activity first and add an Evidence later, or create both at the same time. The Evidence contains the same information as the Activity (Goals, Activity, title, description) |
Three different views of a Collection page