Review Presets
Last updated: July 30, 2026
Summary
A Review Preset (Progress Review template) is a scaffolding tool that helps learners to create a Progress Review Request. A Power User with Template Creator abilities can set up the Preset. Learners can then use the Preset as a base for their own Review Request.
How to create a Review Preset?
Super Admins and Power Users with the Template Creator ability can manage Review Presets in the Scaffolds tab. If you don't already have these permissions, you can request them from an administrator. See 📄 Super Admins, Power Users, and Departments.
Most aspects of a Progress Review Request (see 📄 Create a Progress Review Request) can be suggested in a Review Preset: details, Goals, Rubric Scale Levels, and invite roles. The learner can use a Preset as a base for creating a Review Request. Learners can modify or add on to the suggestions proposed in the Preset.
Go to Scaffolds → Review presets
Click + Review Preset
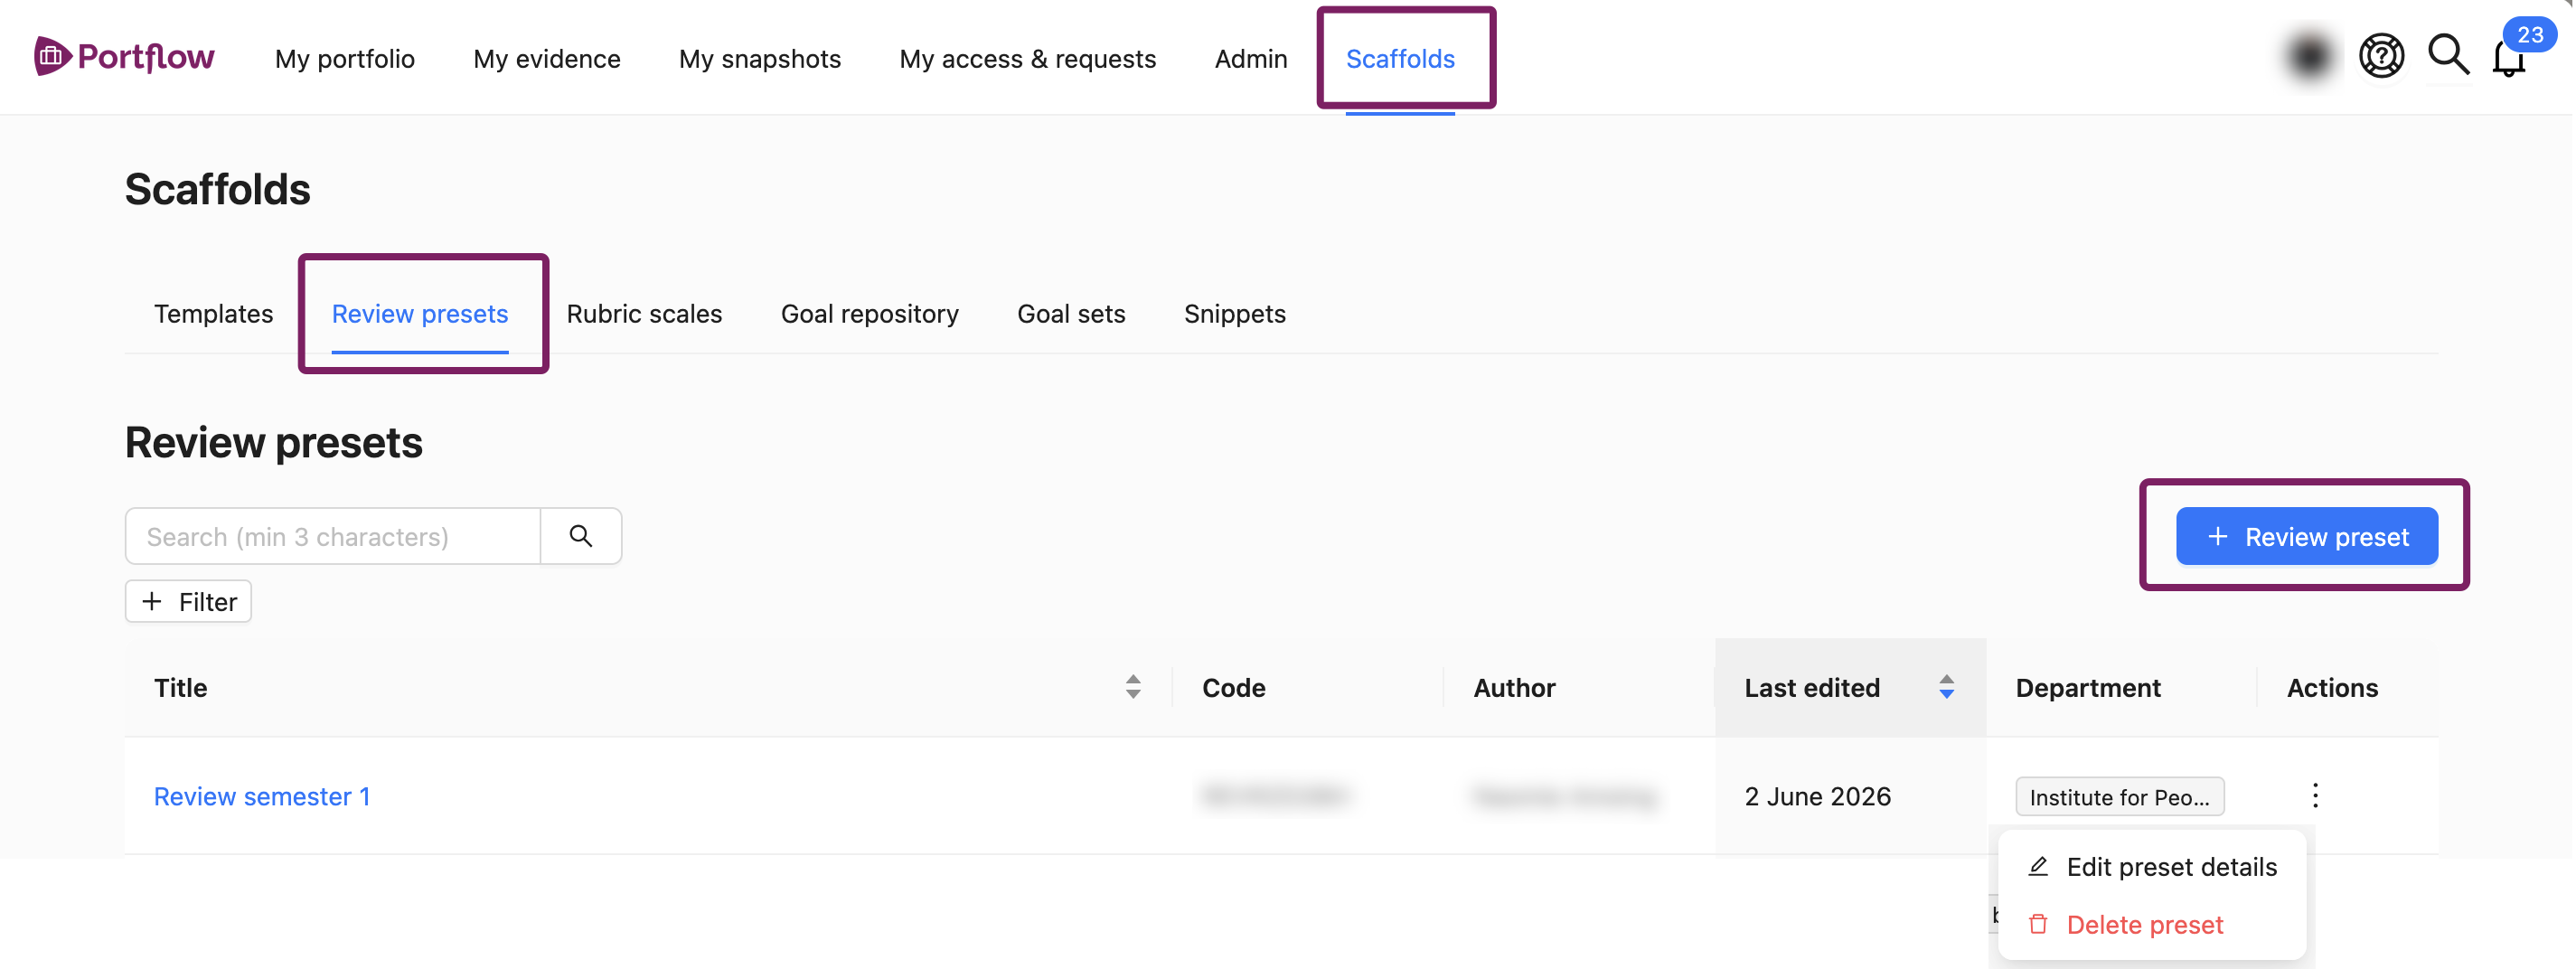
Enter the required Title, optionally write Internal guidelines for other Power Users, and choose a Department.
Selecting a Department restricts editing permissions to Power Users within that same Department.You will now see a blank Review Preset. You provide more or less scaffolding by filling in all or just a few details and settings as you see fit. In the next chapters, we'll walk through the various options.
Note: you have to manually Save to apply made changes. You can do this using the button at the top or bottom.


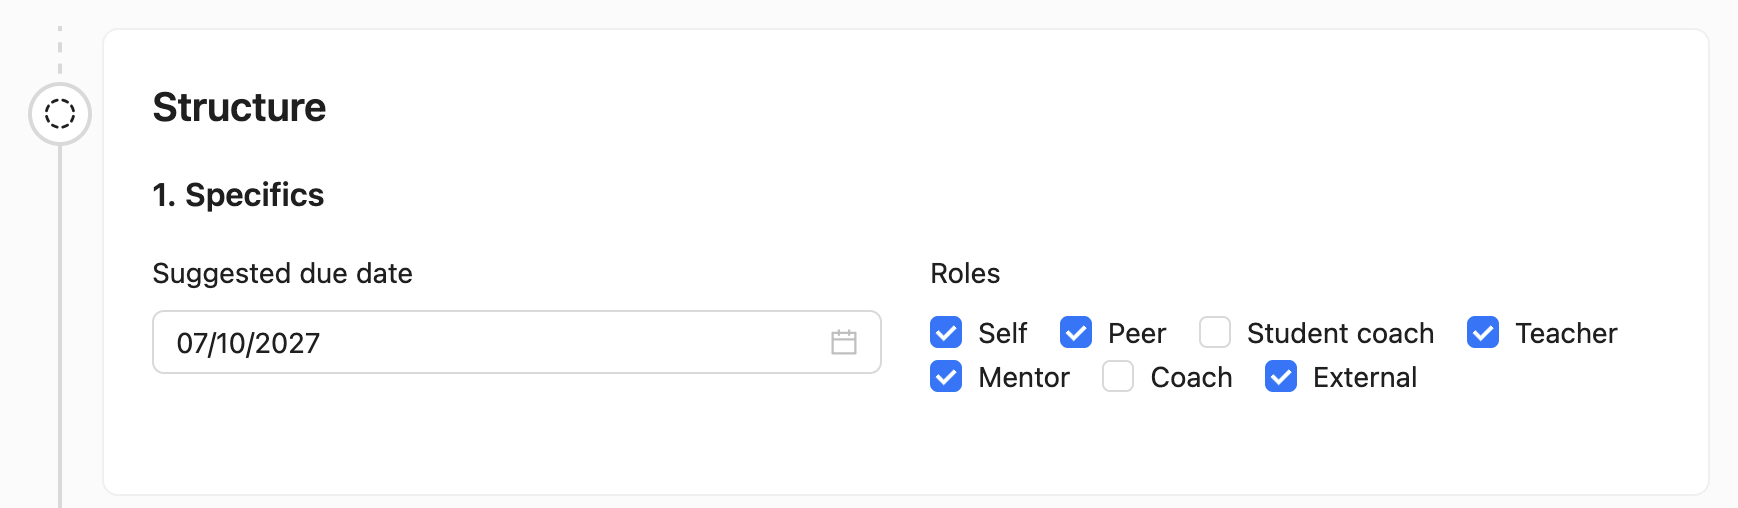
Step 1: Details
You can define a Suggested due date. The learner asks reviewers to respond by this date.
You can select Roles. The learner can then pick people with access to their Portfolio they invite for each of the suggested roles.
Step 2: Goals
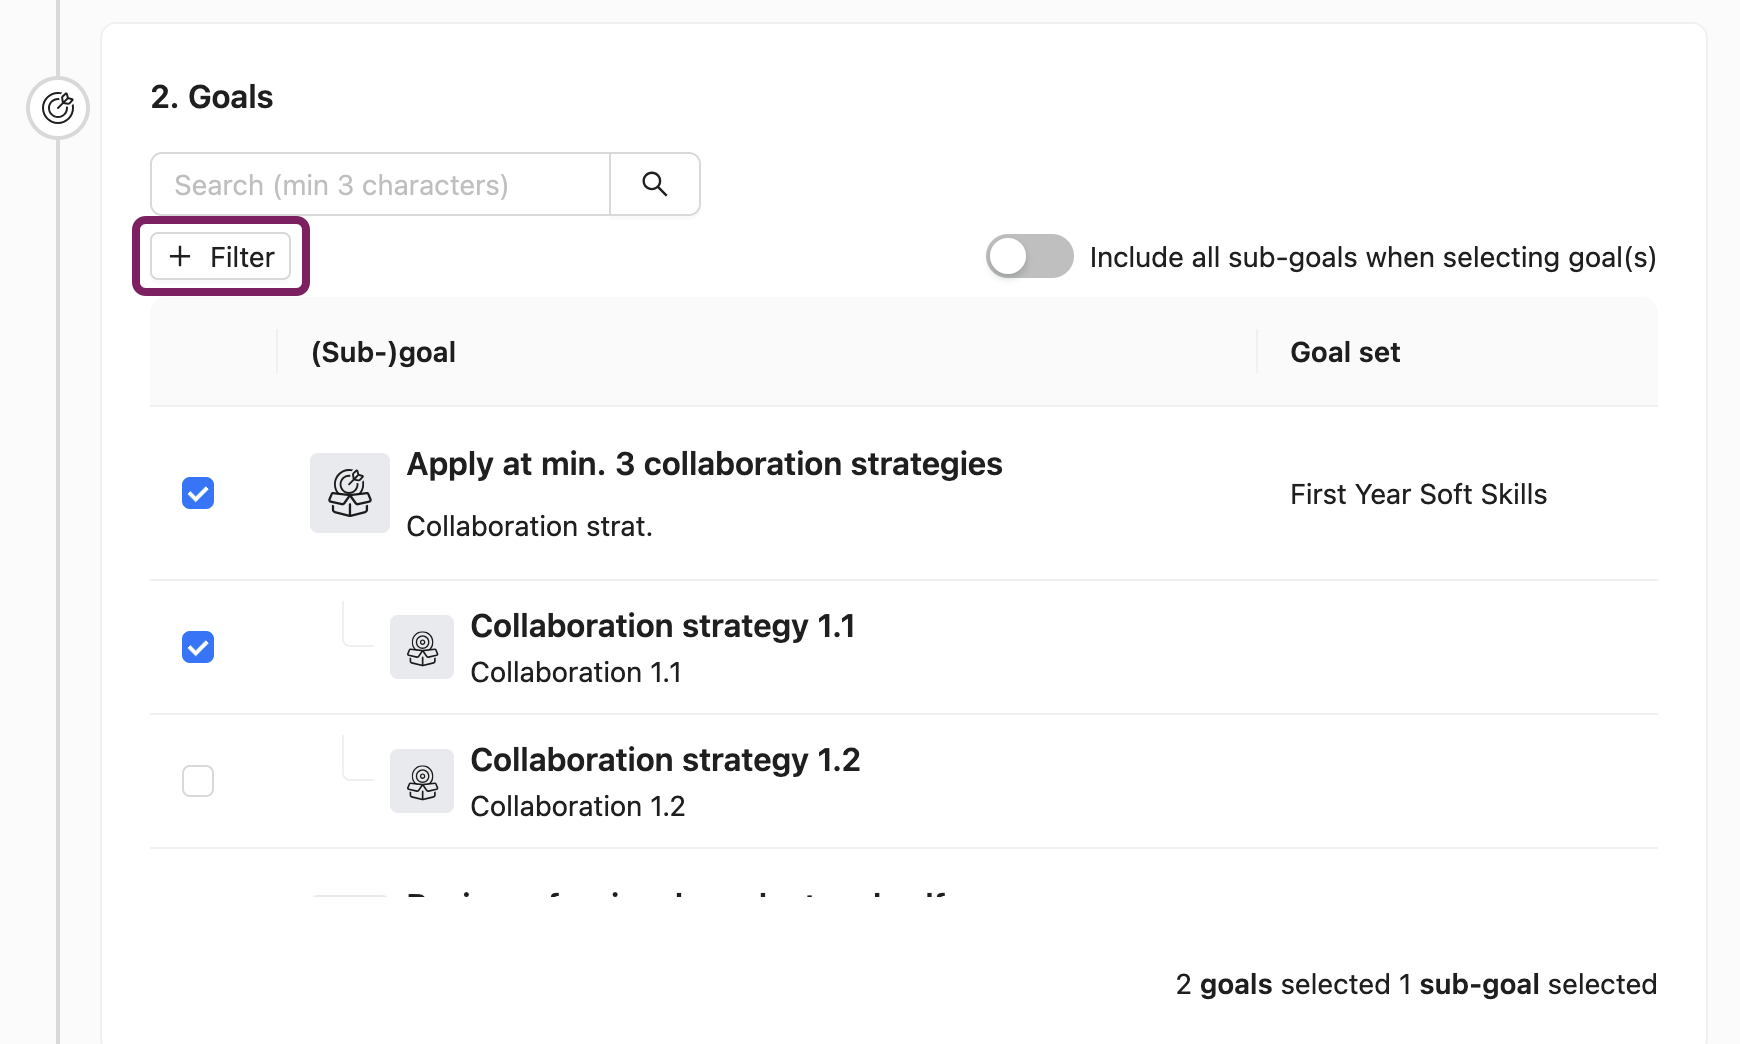
You can select Goals and Sub-Goals from the Goal Repository. You can search by name or nickname.
Tip: Use the “Goal set” filter to select all goals from a goal set. You can check at the bottom of the table to see how many Goals and Subgoals you have selected.
Note:
You can only select Goals from the Goal Repository in a Review Preset.
Learners will need to have imported the suggested Goals into their own Portfolio first to be able to select them in their Review request. If needed, distribute a template first (see 📄 Templatesand📄 Import a Template).
Step 3: Levels and Rubric Scales
You can choose whether to suggest nothing in particular, or to suggest that the review is requested With or Without levels.
If you select With levels, you can suggest a Rubric Scale for the Goals and, if necessary, a different scale for Sub-Goals.
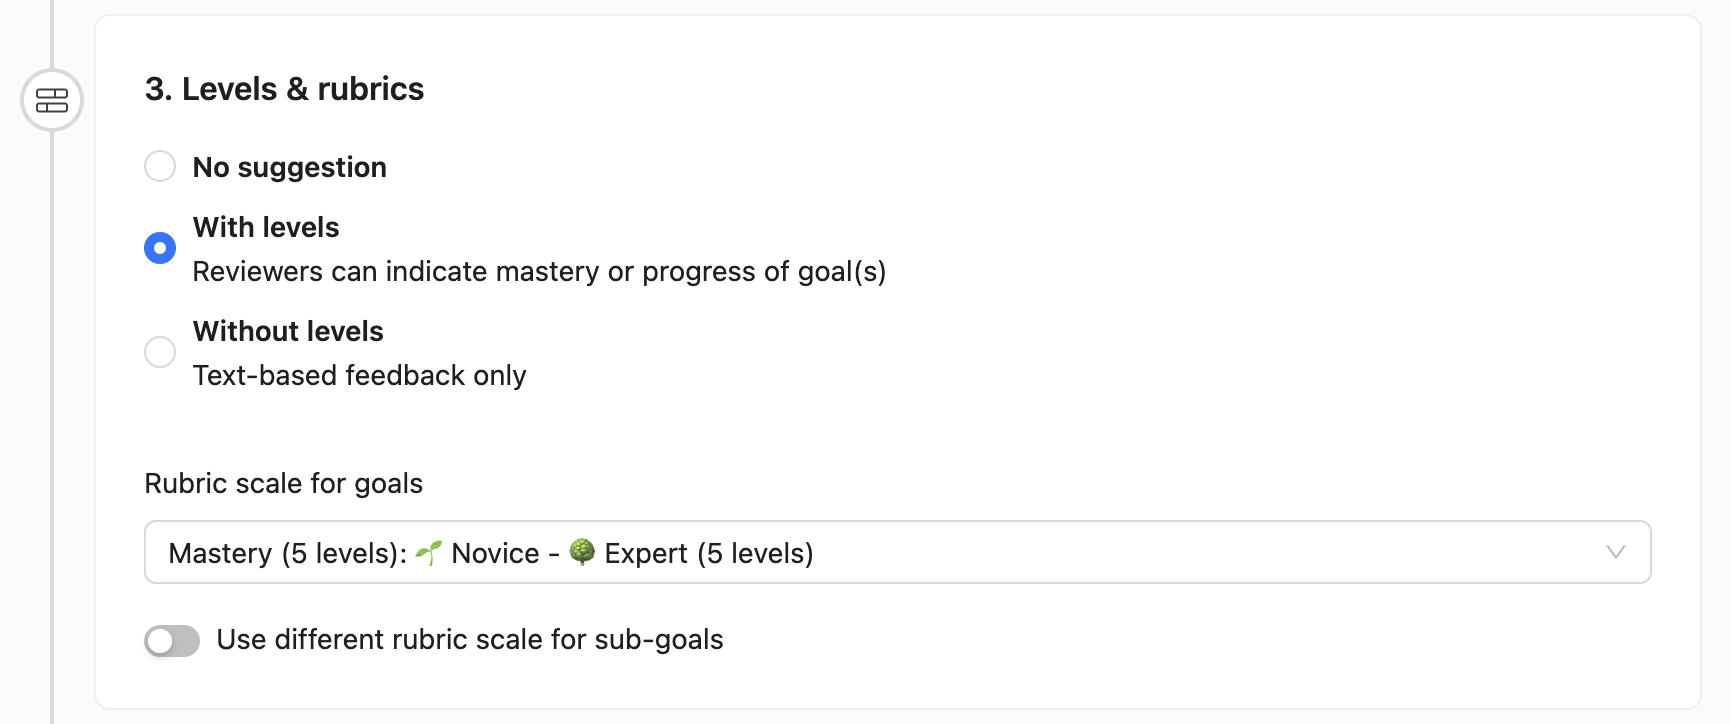
Note: You can select an unpublished Rubric Scale. However, that scale will need to be published to be usable by learners in the Progress Review.
How to share or distribute a Review Preset with/to learners?
There are two main ways to distribute a Template to learners: via Sharing the Preset Code or by Distribution through a notification.
Sharing the Preset Code
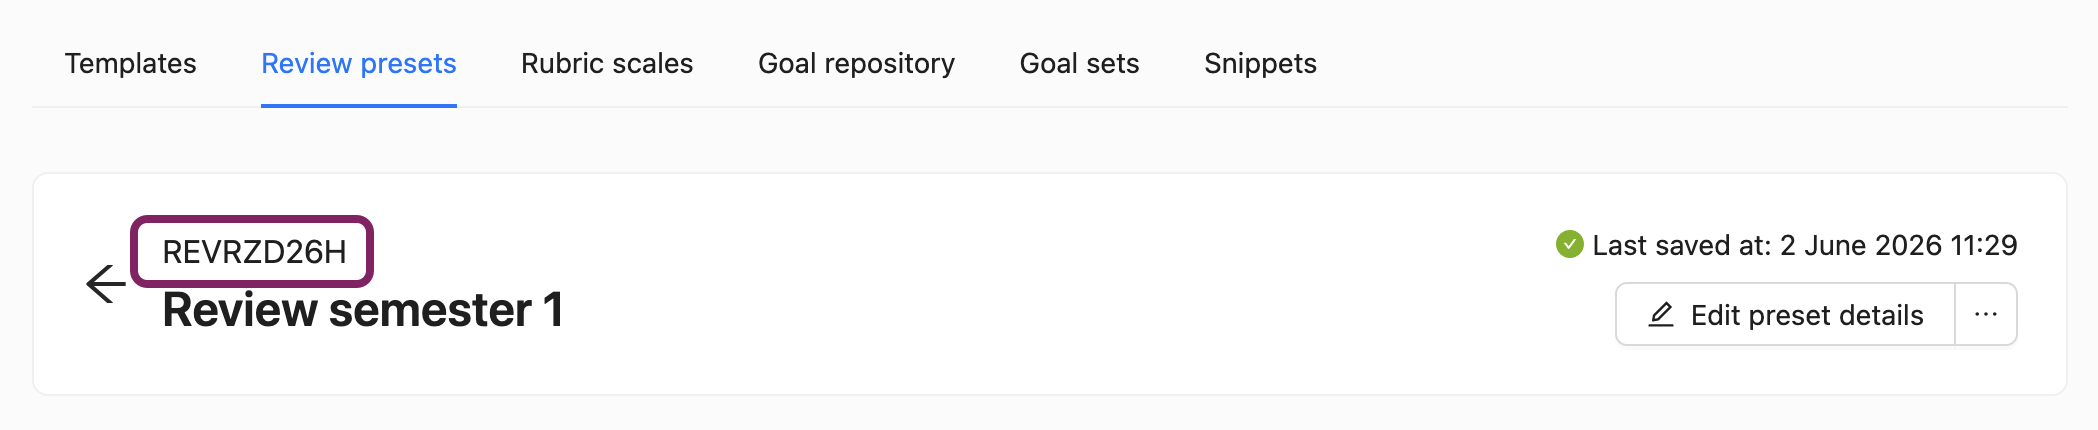
In the banner of the Review Preset, you will find a Code starting with REV. You can copy this Code and share it with learners, e.g. via a Course announcement or message. Learners can then input the Code when they create a new Progress Review Request and use the Preset as a template.
How to start a Progress Review Request with a Preset Code?
As a learner, go to Goals & Progress
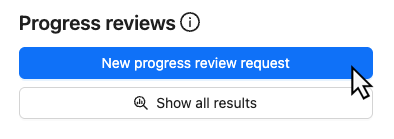
Click New progress review request
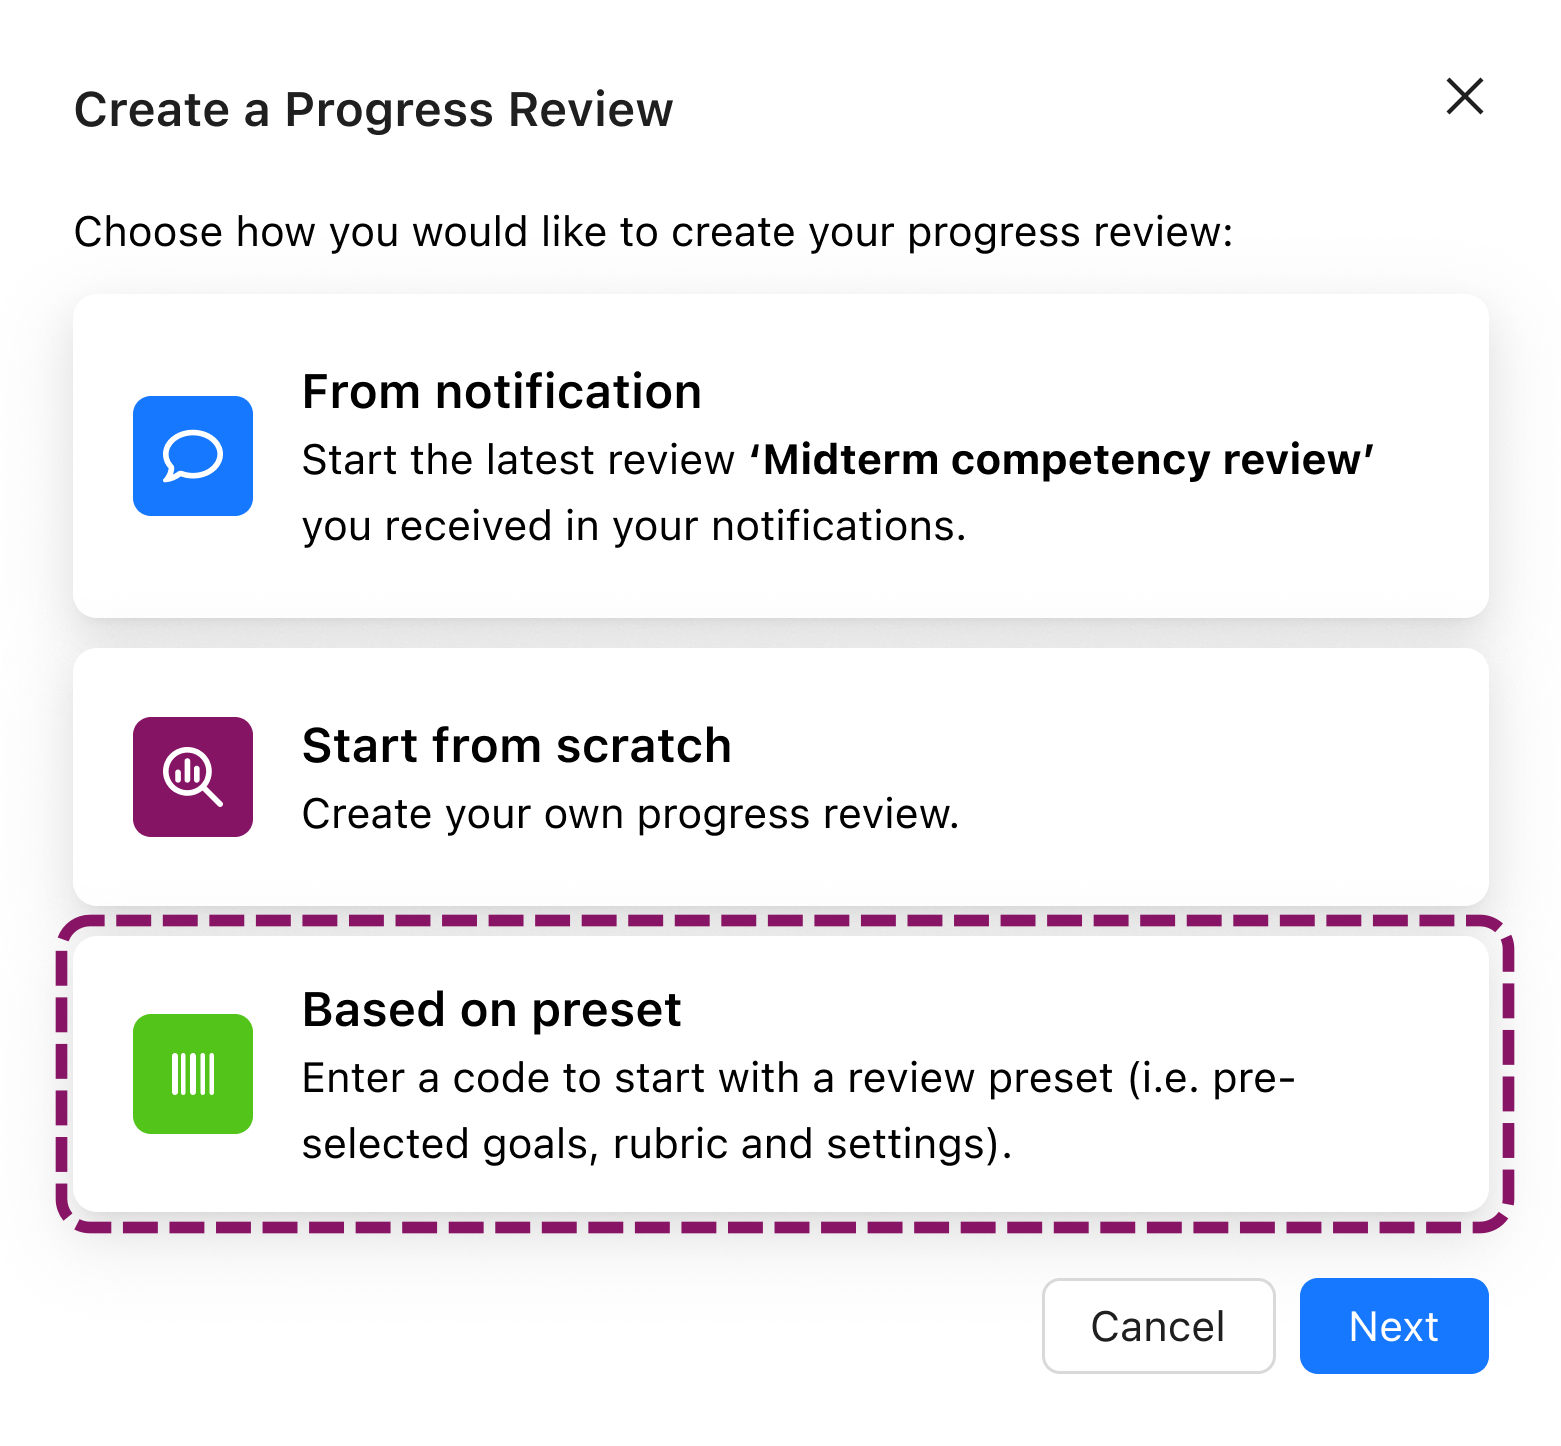
In the menu, choose Based on preset and click Next.
In the following step, enter the Code you have received.
From the preview, you can either decide to accept all suggestions and go to step 3 ‘details’ immediately (1: Continue), or go through each step (Goals, Levels, Details) to customise the request (2: Customise).
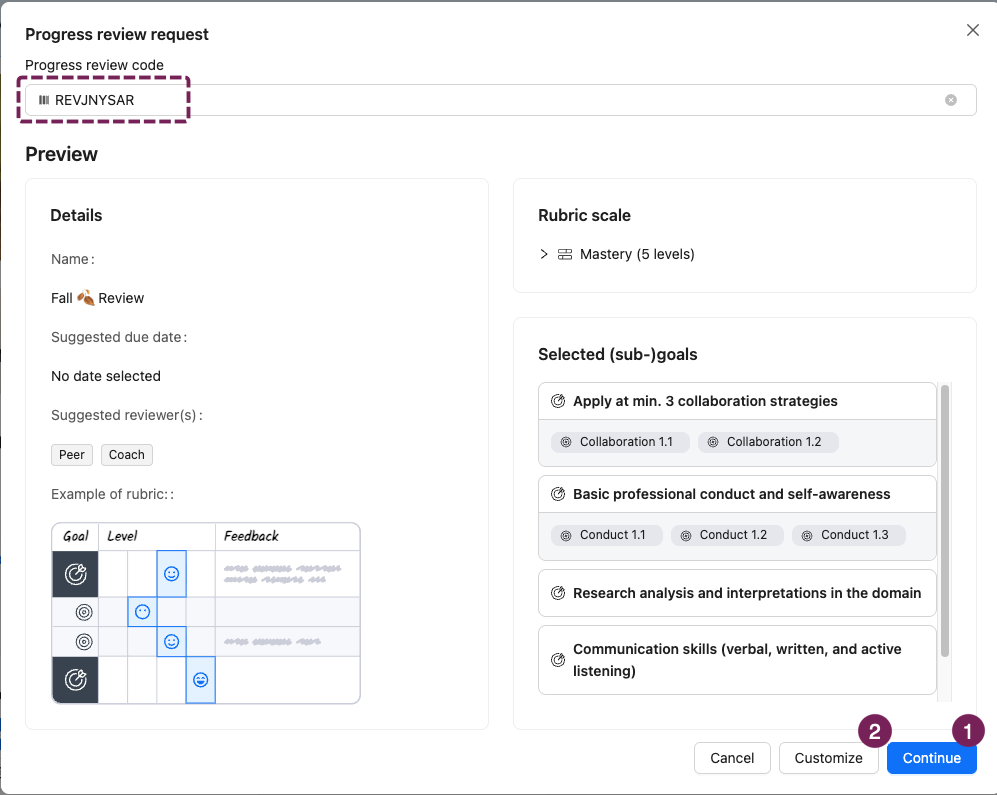
Note: The suggestions from the preset will be prefilled in your request, but you can make any adjustments to match your exact situation.
Distribution through a notification
Applicable for | 🐼 |
Not applicable for | 🎓 |
In the banner of a Review Preset, you will find a button to share the Preset with learners (Share with learners). Click the button, then go to the second tab ('Distribute to course').
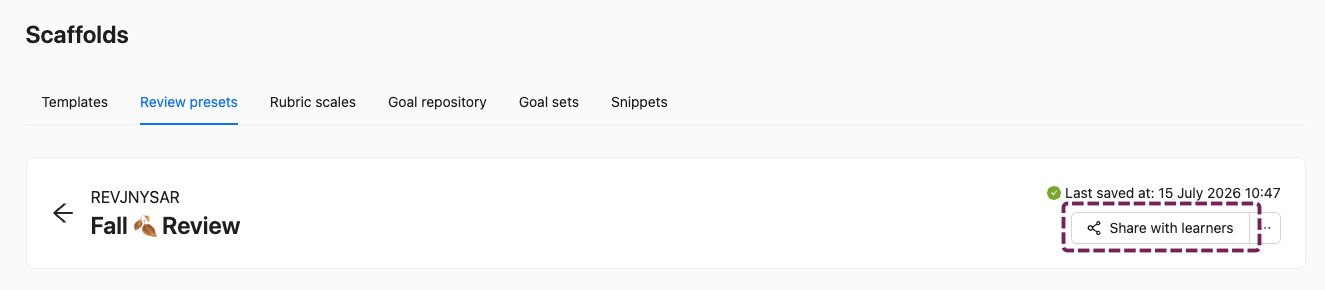
From here, choose a Course in the dropdown (1). You can check who is going to receive the suggestion using the CSV ‘Download list of recipients’ (2). If needed, you can exclude the group which will receive the suggestion again, or has received the suggestion before (3). Confirm the distribution with the button ‘Distribute’ (4). Selected learners will now receive a notification from where they can start the Review Request using the preset.
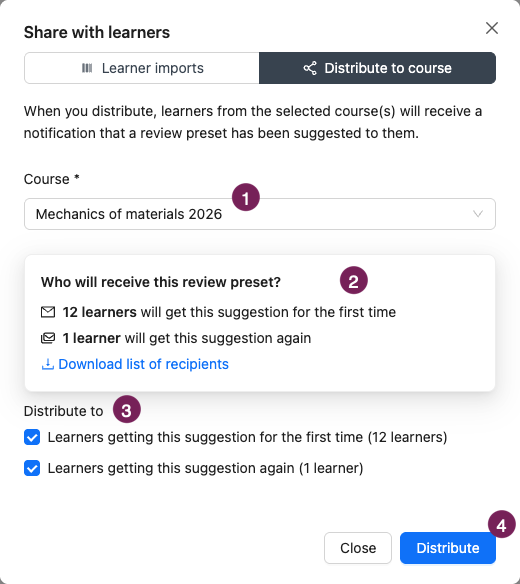
How to start a Review Request from the Preset notification?
From the Notification centre
As a learner, when you have received a notification with a Review Preset, you can start the Progress Review Request immediately from the link in the notification (1).
Note: If you had previously received a notification (or instruction) to import a Template, it is recommended to first import this Template (2).
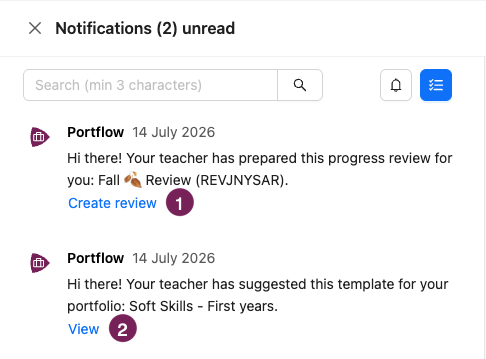
Using the 'From notification' option
As a learner, go to Goals & Progress
Click New progress review request
In the menu, choose ‘From notification’ and click Next.
This will enter the code from the most recently received preset suggestion.
Je kunt tot een maand na de ontvangstdatum van de suggestie op deze manier een Evaluatieverzoek starten.
From the preview, you can either decide to accept all suggestions and go to step 3 ‘details’ immediately (1: Continue), or go through each step (Goals, Levels, Details) to customise the request (2: Customise).