Confidential evidence (NDA, embargo, sensitive, private or confidential content)
Last updated: November 2, 2026
Summary
Some Evidence must be kept confidential, for example materials from an internship at an organization that handles sensitive information. This article explains how to handle confidential content in Portflow from start to finish. You collect it in a private Collection, share specific Evidence for Feedback, and include it in a Snapshot for assessment.
Applicable for | 🐼 |
Not applicable for | — |
Collect confidential content in a private Collection
As a learner, you can make any of your Collections private. Create a new Collection for your confidential content first, if you do not have one yet.
Click the Action menu (︙) of the Collection.
Select Make private (1).
Read the pop-up and click Make private to confirm.
A private Collection turns grey and gets a private label (2), so you can easily tell it apart from your other Collections.
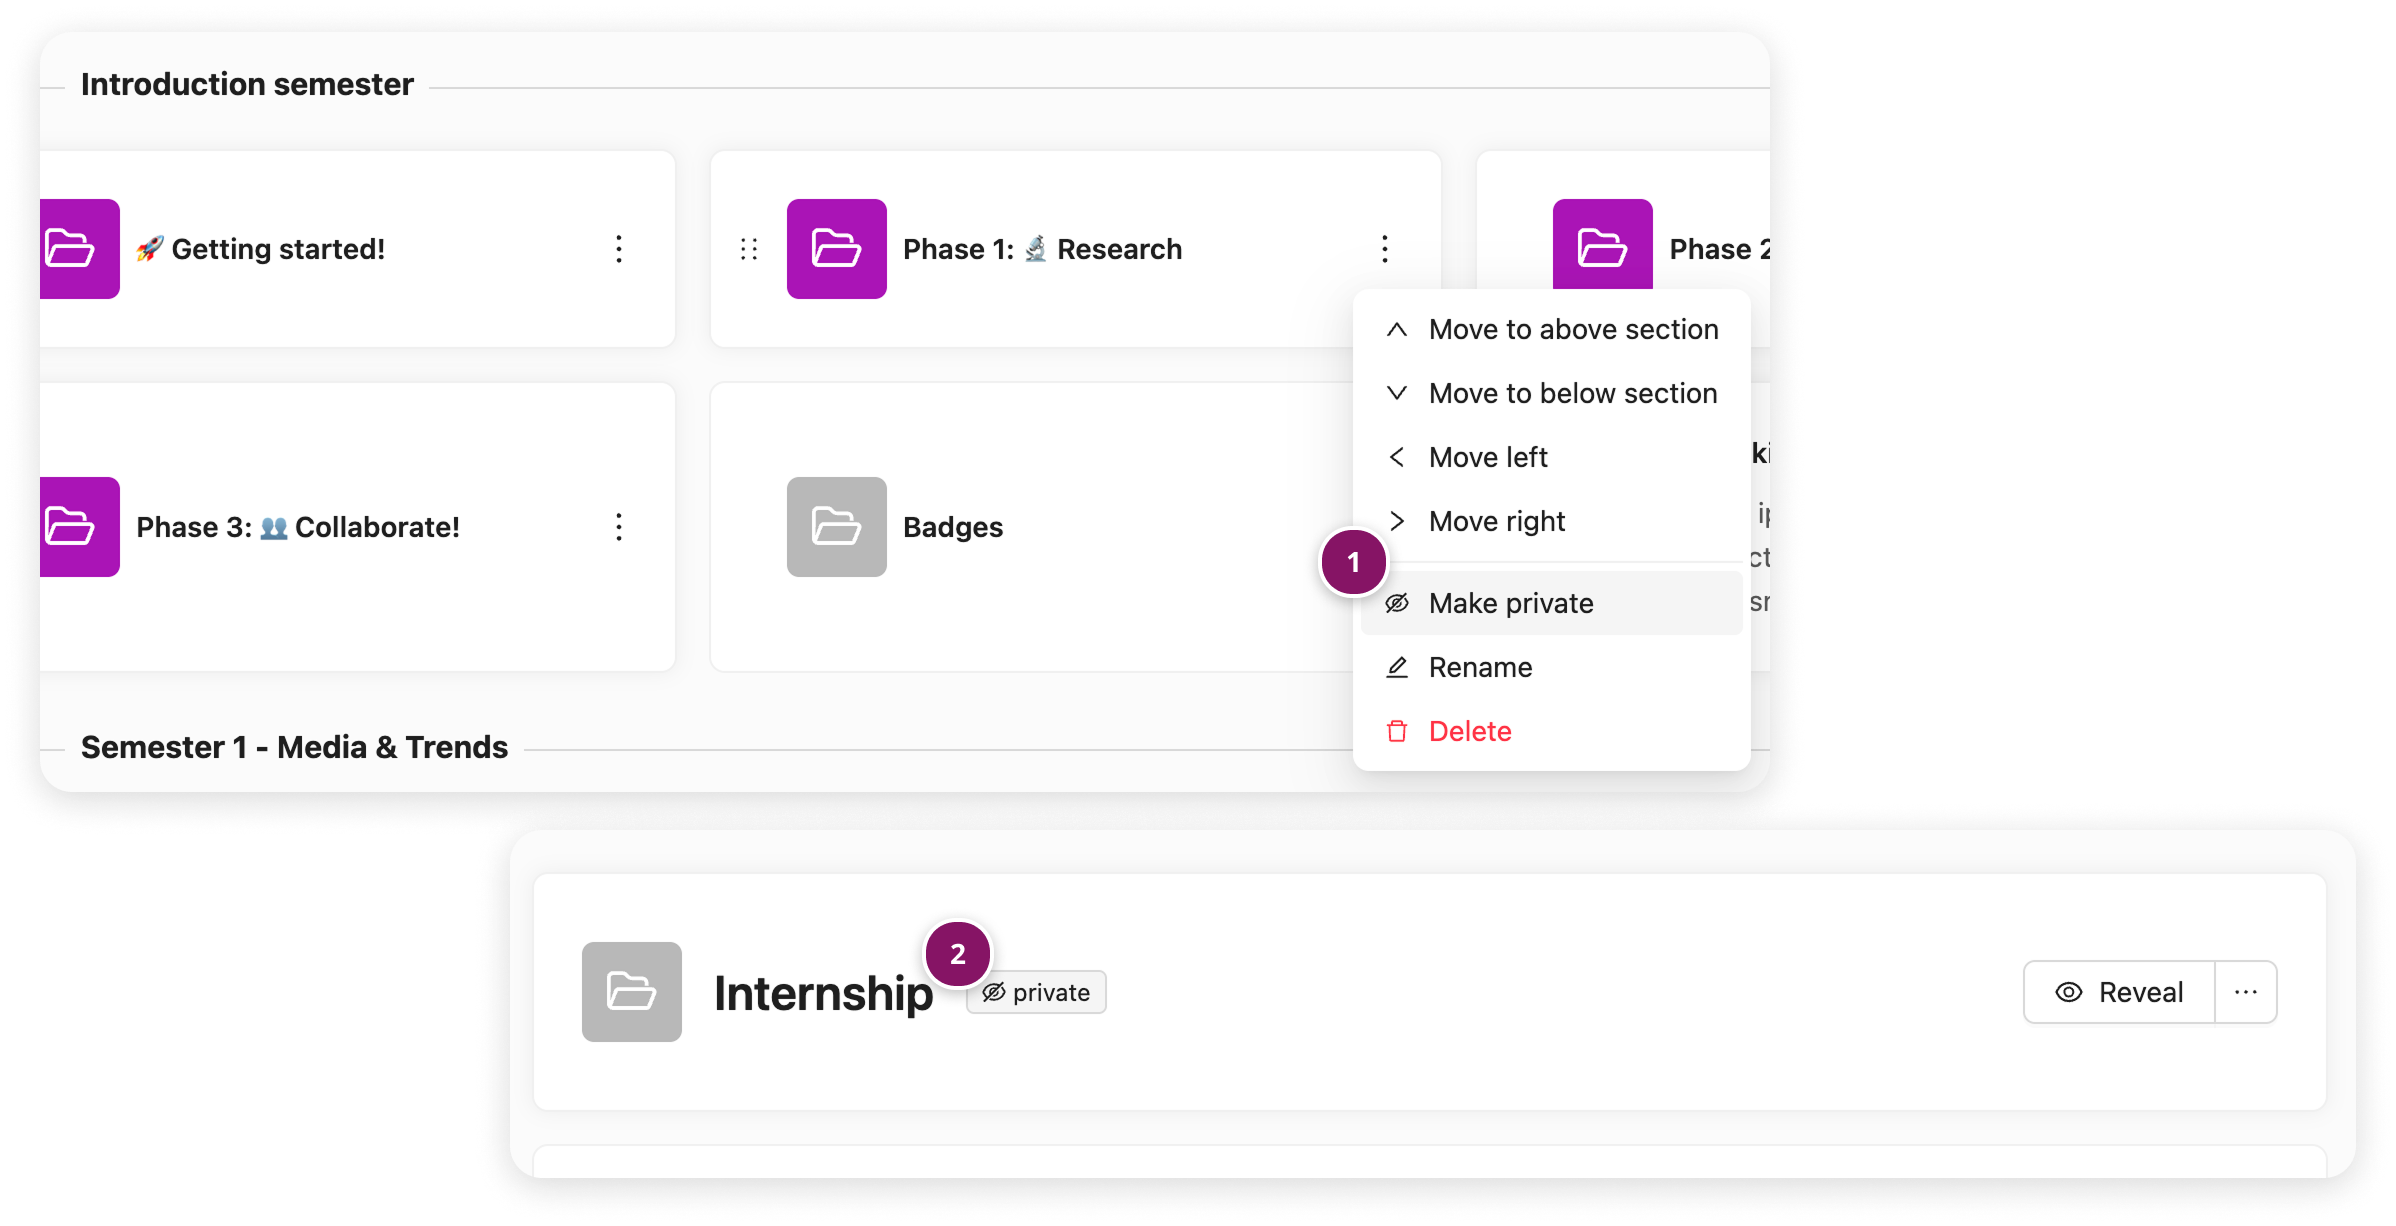
Making a Collection private will:
Remove access for anyone the Collection is currently shared with;
Prevent others from viewing the Collection and its content, also when you share your entire Portfolio;
Still allow you to select the Collection when creating a Snapshot.
Add confidential Evidence only to private Collections (and no other Collections). Evidence can be added to more than one Collection. If you add confidential Evidence to a private Collection and to a regular Collection, it is visible to everyone who has access to that regular Collection or to your entire Portfolio.
Share specific Evidence for Feedback
Others cannot see the Evidence in your private Collection. To get Feedback, share only the specific Evidence you want Feedback on.
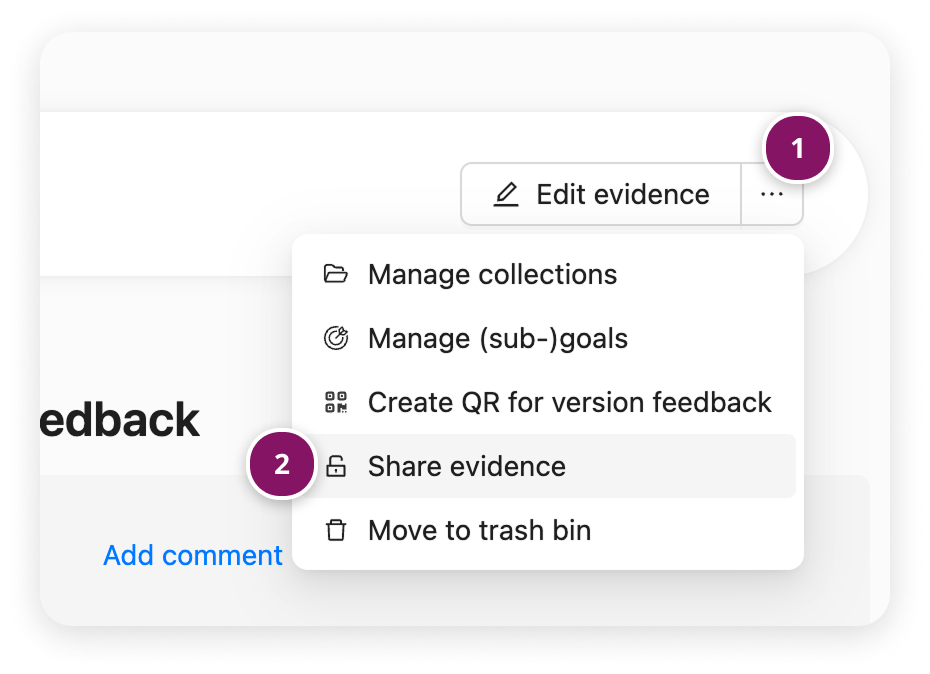
Open the Evidence you want Feedback on.
Click the Action button (⋯) next to Edit evidence (1).
Select Share evidence (2).
Follow the steps to share with an LMS user, such as your teacher, or with an external user, such as your workplace supervisor.
Once the person has access to the Evidence, you can send them a Feedback Request (📄 Request and Provide Feedback) on the Evidence page as usual.
Include confidential content in your snapshot
Private Collections are not normally available when you create a snapshot, unless you actively choose to include them.
Click Create a snapshot in the menu at the top right and choose the Collection-based or Goal-based flow.
Turn on the Include private collections filter (1). Your private Collections now appear in the list, marked with the eye icon (2).
Select the private Collection(s) you want to include.
Complete the remaining steps to finish the snapshot.
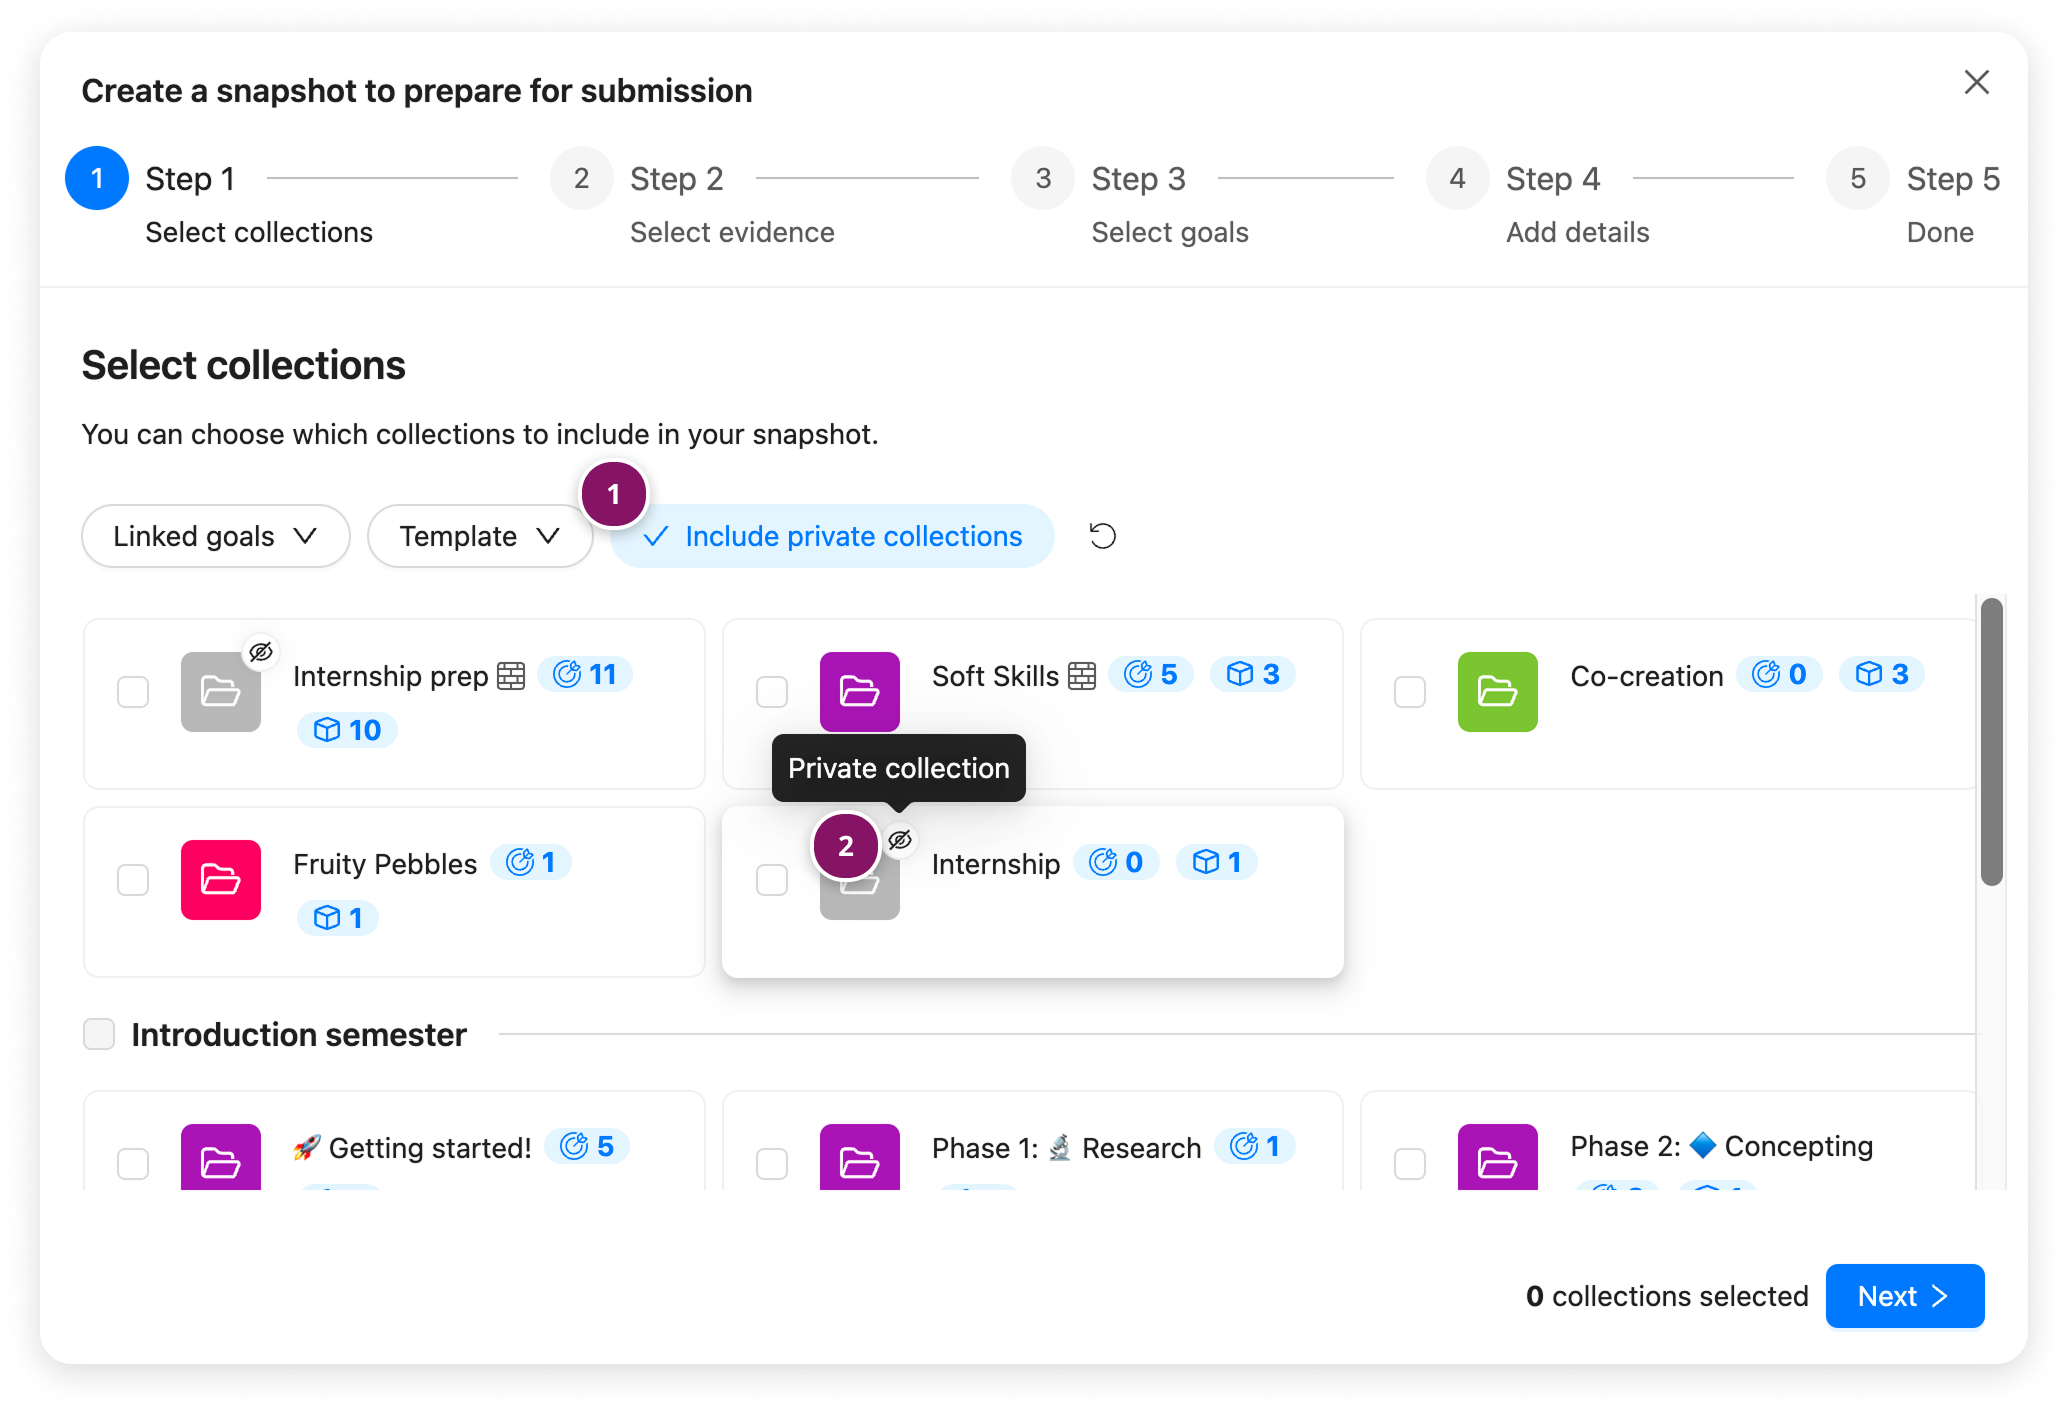
The Include private collections filter is only shown if your Portfolio has at least one private Collection. It is turned off by default.
Who can see the private Collection in my Snapshot?
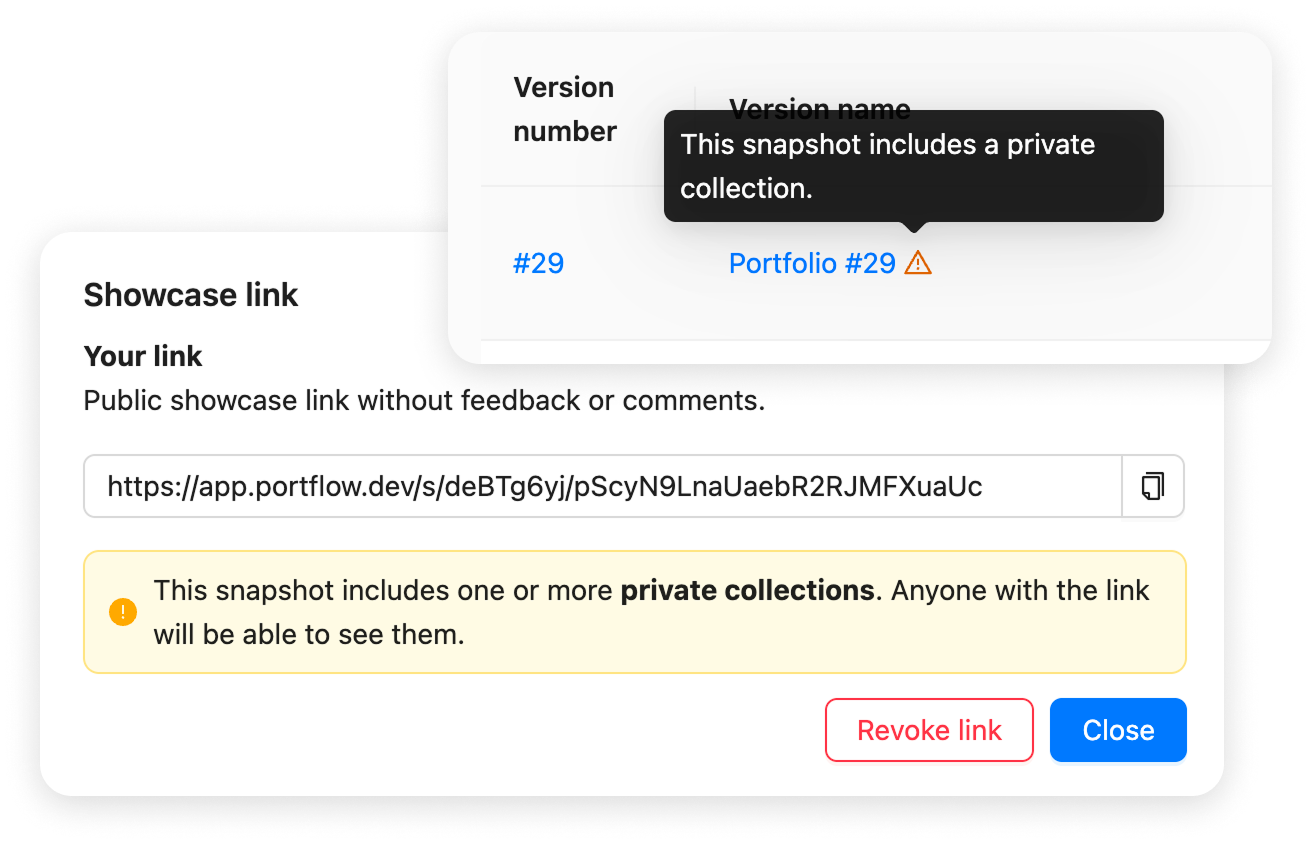
Everyone with access to the Snapshot can see the private Collections you included. Portflow reminds you of this in several places:
On the My snapshots page, a warning icon is shown next to the name of a Snapshot that includes a private Collection. The same icon is shown when you select a Snapshot to submit in an LMS assignment.
When you create an Assessment link or a Showcase link for a Snapshot with a private Collection.
Summary of visibility of a private Collection:
Can see the private Collection | Can see the Evidence in a private Collection | |
|---|---|---|
You (Portfolio owner) | ✓ Visible | ✓ Visible |
Visitors with a Portfolio Share | X Not visible | X Not visible (Unless the Evidence is also added to a regular Collection) |
Visitors with an Evidence Share | X Not visible | ✓ Visible |
Assessors and visitors with a link to a Snapshot that includes the Collection | ✓ Visible | ✓ Visible |