Create Free Text Evidence
Last updated: September 7, 2026
Summary
Learners can directly create new Evidence in Portflow by creating a Free Text Evidence. This provides a rich text editor that allows for text, images, tables and much more. Moreover, Free Text Evidence can be scaffolded in Portflow using Evidence Snippets (see 📄 Snippets (Evidence templates and Feedback templates).
How to create Free Text Evidence?
As a learner, next to uploading files as Evidence, you can directly create Evidence within Portflow. You can choose to create Free Text Evidence on any page where you can add Evidence, such as the Collection page, the Goal Card or the 'My Evidence' page.
Click + Add evidence or the button with a plus and a cube icon (+☐).
Select Free text
Give the Evidence a name (you can change this later)
Use the text editor to format the evidence. You can add things like images, tables, links, formulas, task lists, or quotes. If desired, you can also add direct references to other Evidence, Collections or Goals using @mentions (📄 Mention Evidence, Collections, Goals, and Sub-Goals)
It is also possible or use ‘Snippets’ as basic building blocks to help structure your Evidence (see below).
Click Add.
Note:
Free Text Evidence does not save automatically, so be careful when closing the window. After saving, however, the text can be edited again. This will create a new Version of the Evidence. See 📄 Evidence Versions.
Using Snippets in a Free Text Evidence
In the Free Text editor, you can add a 'Snippet'. A Snippet is a format/structure that your teacher has prepared to help you create your Evidence. This could be the structure for a specific assignment, or a general structure for a reflection or action plan. A teacher might have included a Snippet in an Activity through an imported Template, or you can import a Snippet from the Snippet Library.
How do I use a Snippet?
Use a Snippet from an imported Template
If your teacher has attached a Snippet to an Activity, you can start a Free Text Evidence with this Snippet directly.
As a learner, go to the Activity view of your Collection
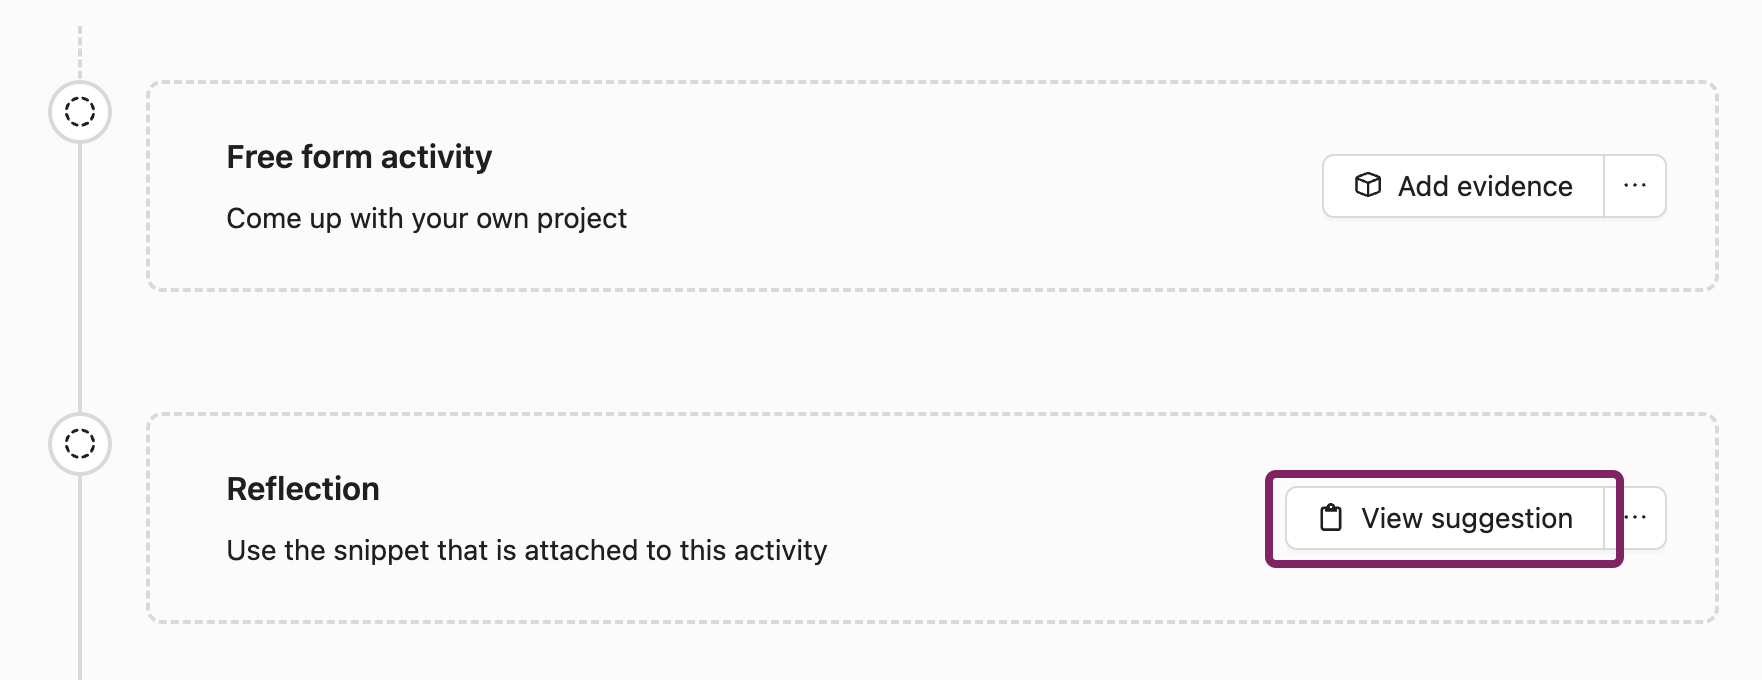
If an Activity has the button View suggestion, instead of ‘Add evidence’, there is a Snippet suggested for it. Click the button.
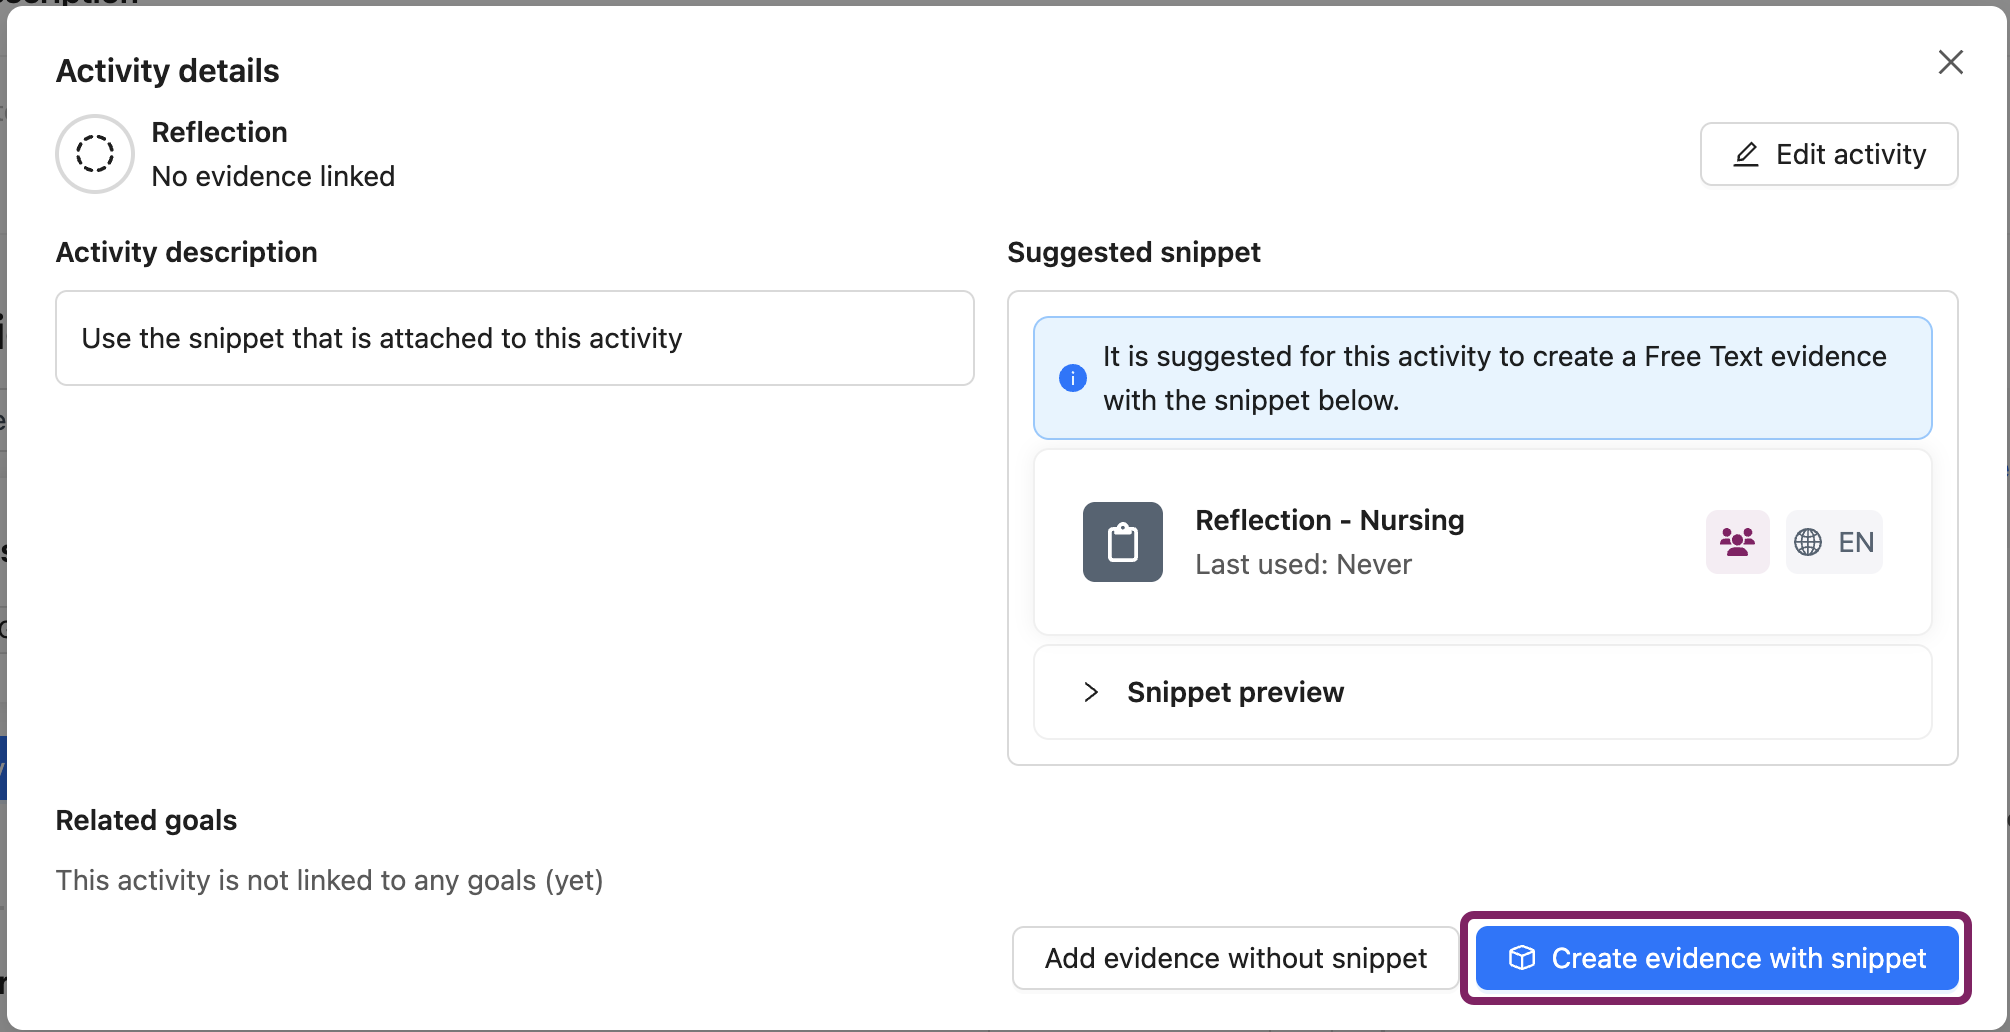
The Activity details with the Snippet information will open. If you want to use the Snippet, you can click the button Create evidence with snippet.
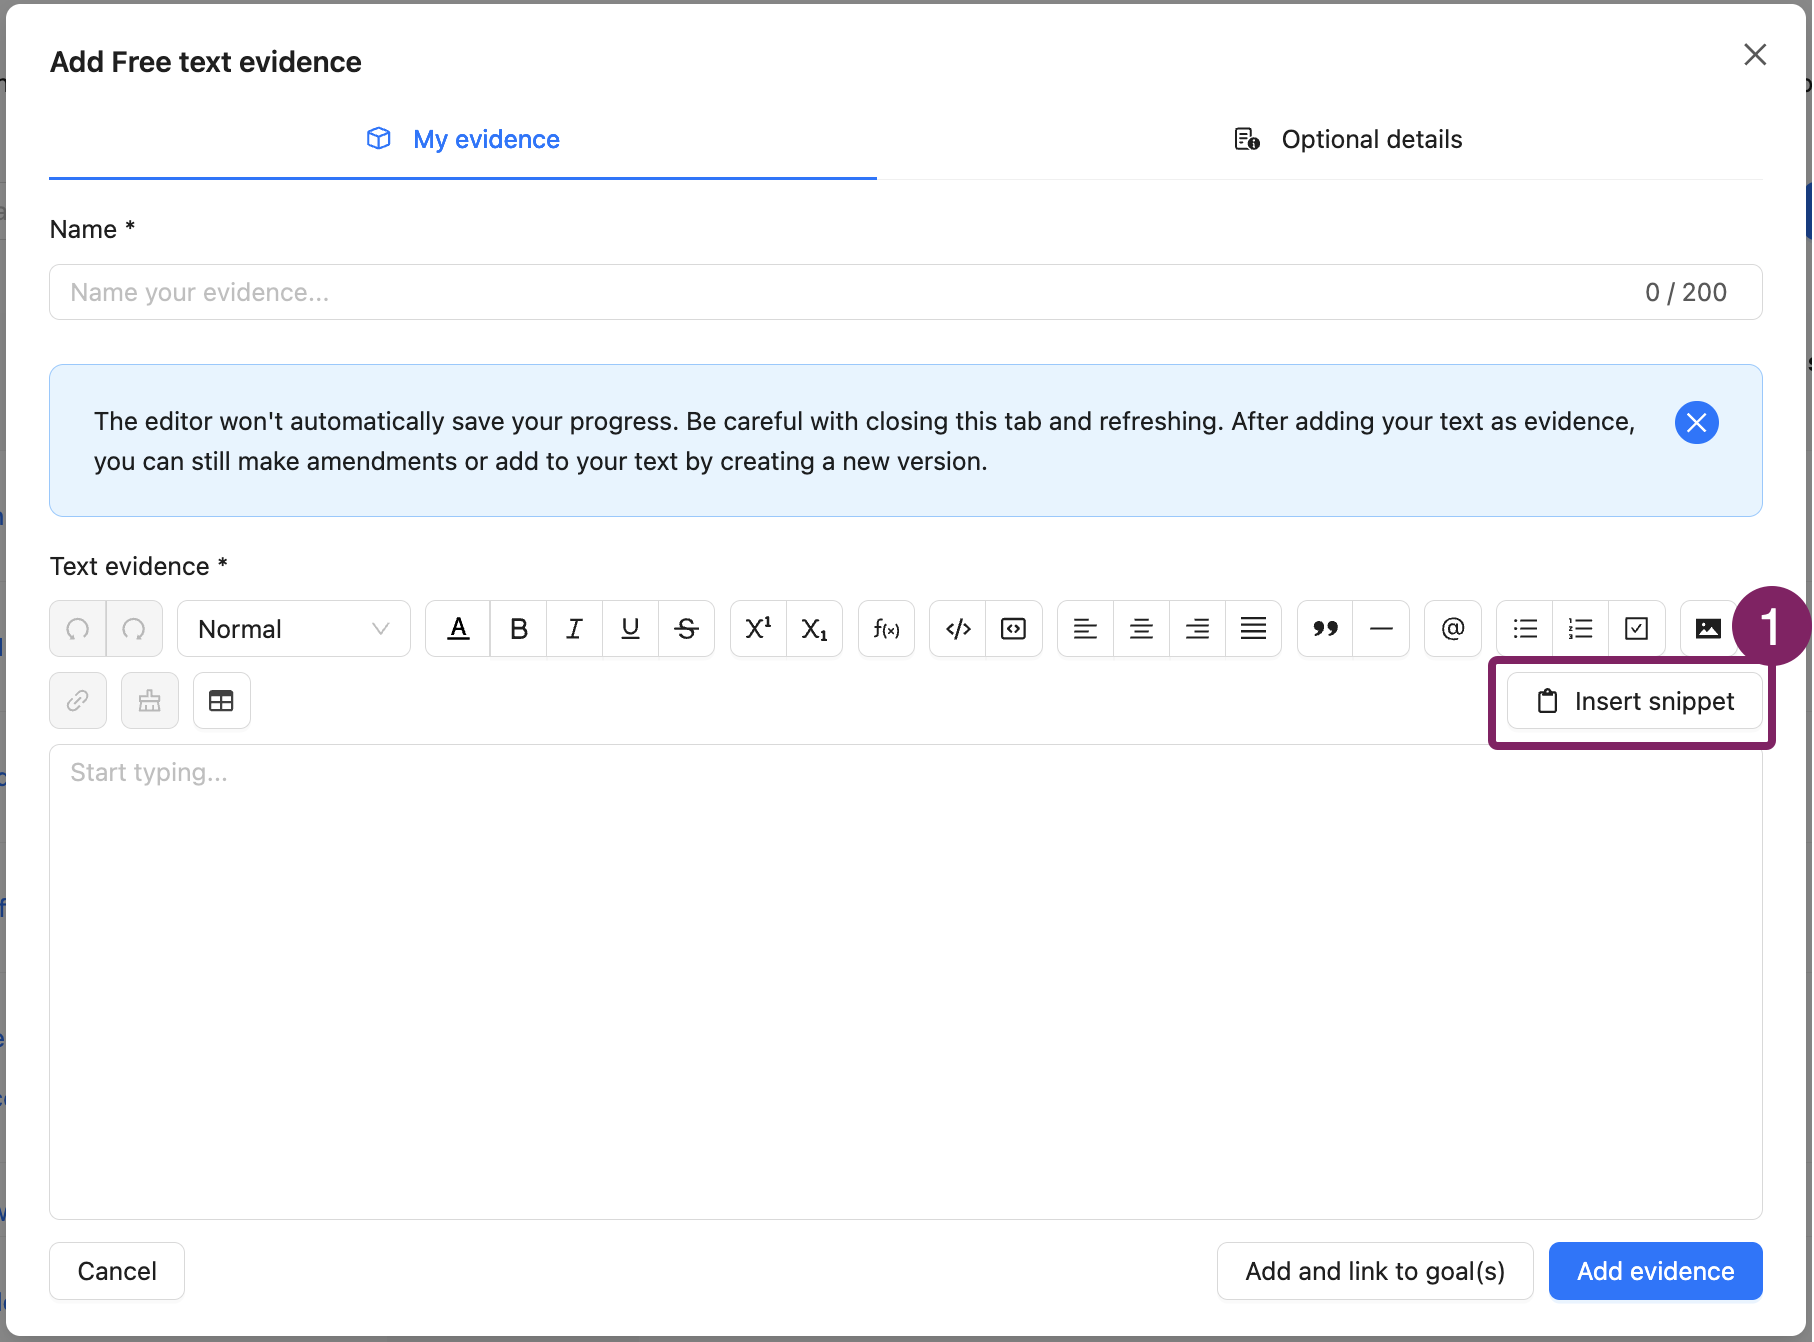
The Snippet will now be prefilled in the free text field. You can make any changes you wish to match your situation.
Find a Snippet from the Snippet Library
There are two types of Snippets: shared or public Snippets. Shared Snippets can only be found using the Snippet code (starting with SNIP). Public Snippets can be found by name.
As a learner, in the Free Text Evidence editor, click Insert snippet (1).
The Snippet Library will now open.
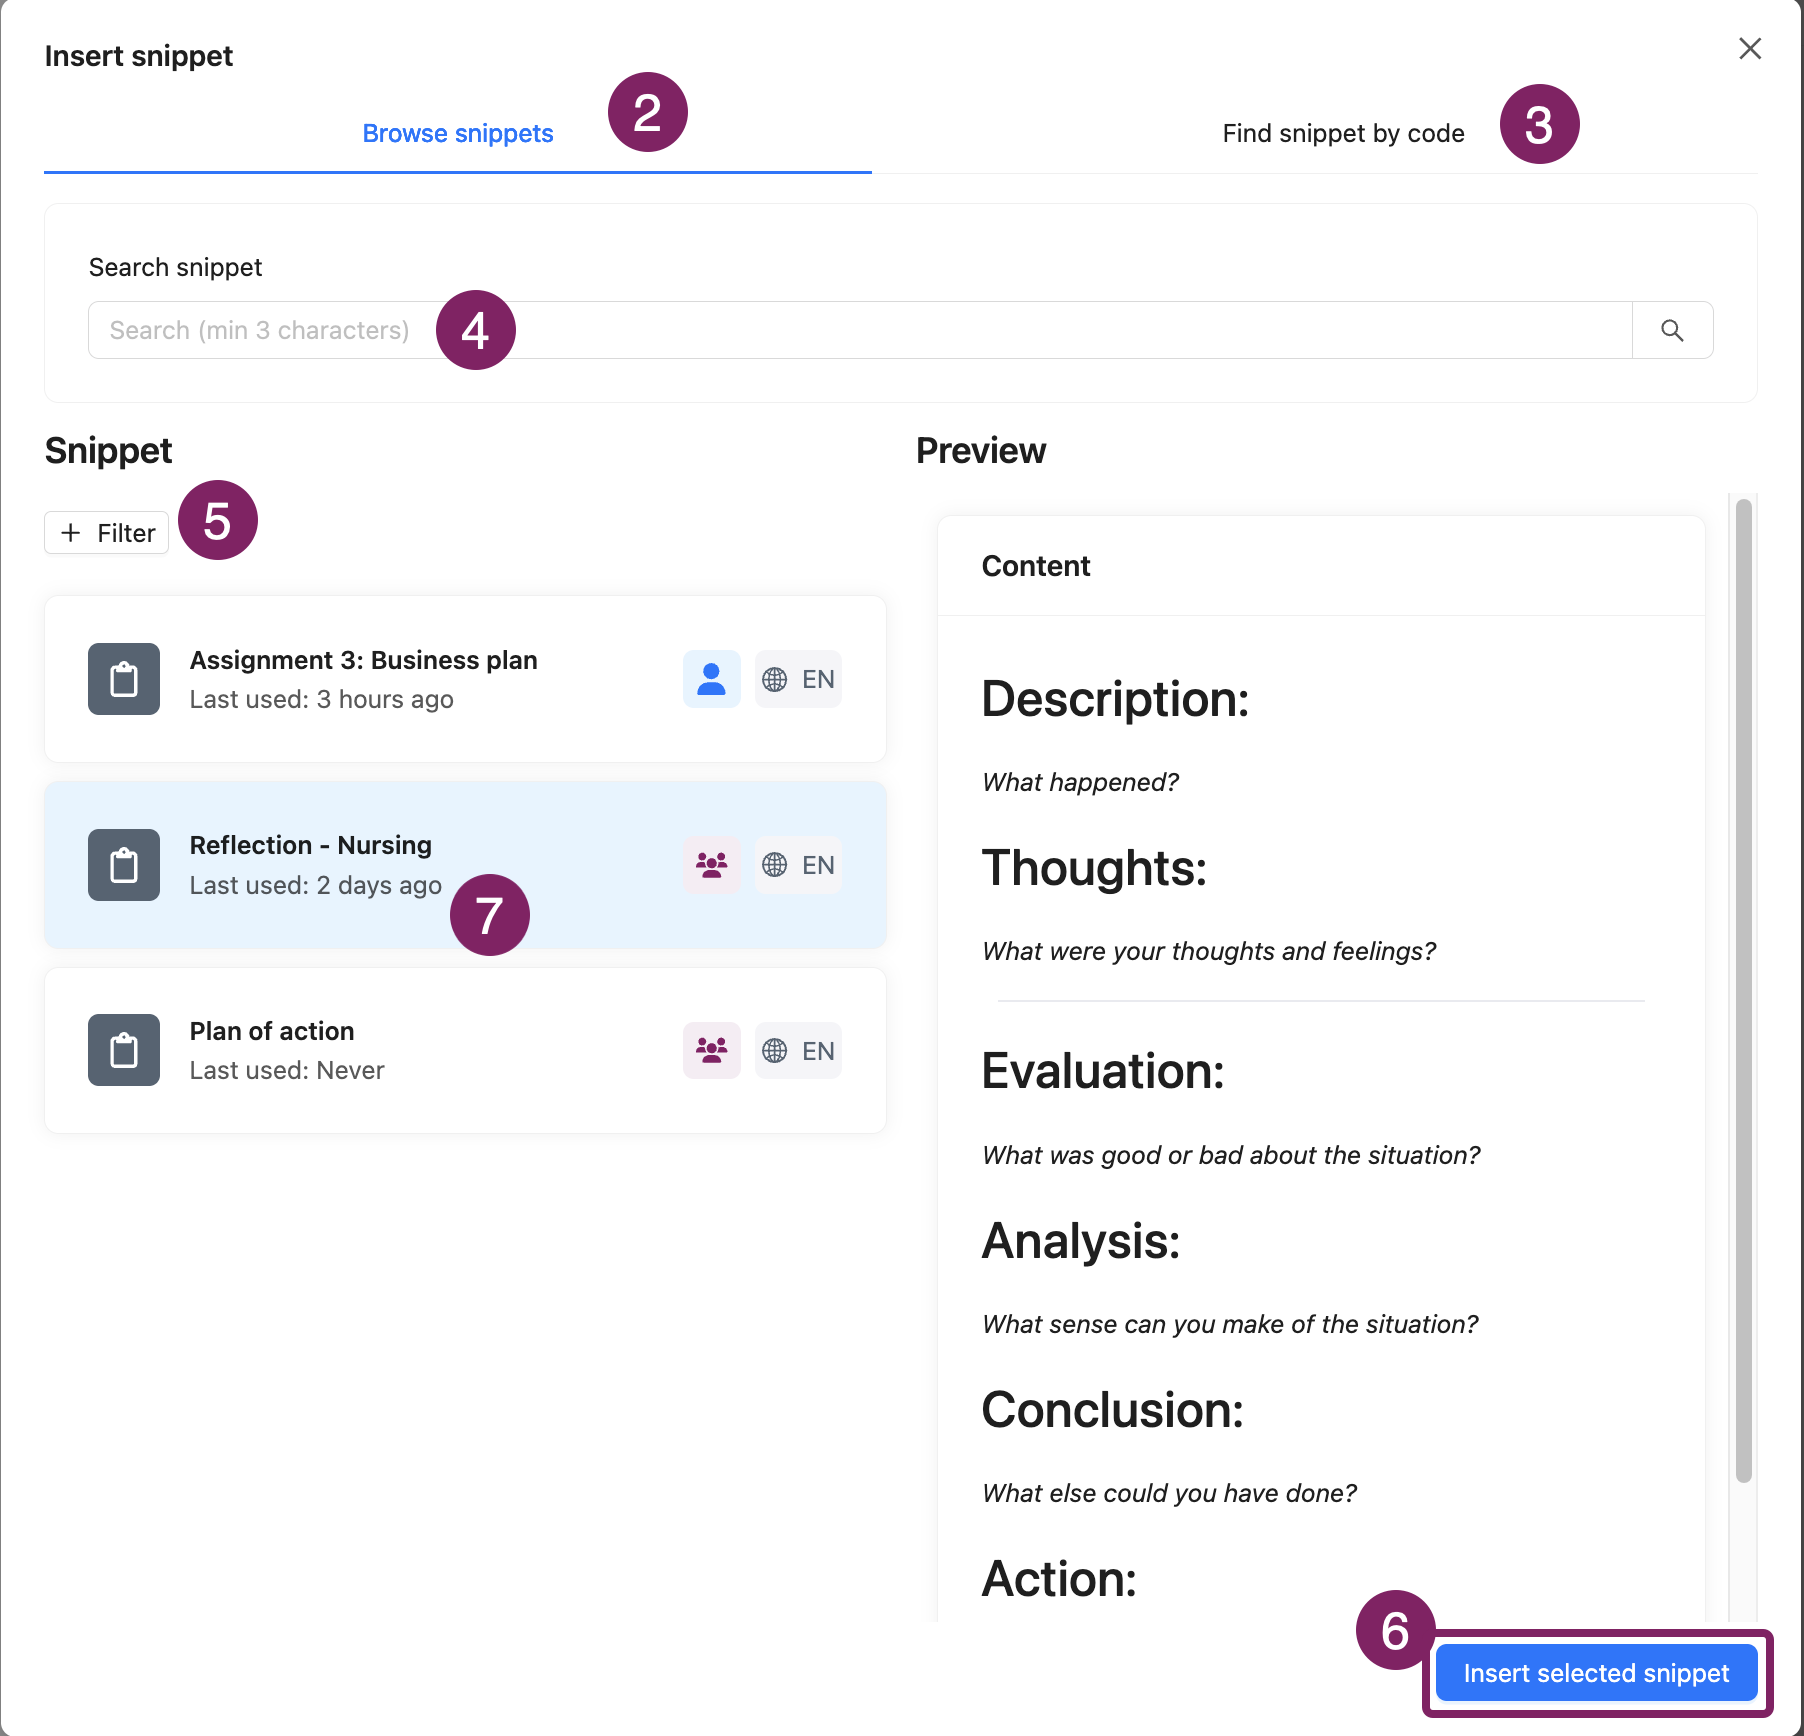
In the Snippet Library, you can search for Snippets by name (2) if the Snippet is 'public'.
You can search for 'shared' Snippets using the Snippet code (3).
Type or paste the name or code of the Snippet into the search bar (4).
You can filter the results (5) by language, availability (shared or public), and usage (have you used the snippet before, or not?).
Once you have found the Snippet, you can view the description and the content of the Snippet. If you want to import this Snippet, click Insert selected snippet (6).
Note:
The Snippet will be inserted at the location of the cursor in your Evidence. This means that you can first add text to the Evidence and then add a Snippet later. You can make any changes you wish to match your situation.
The Snippet Library keeps track of which Snippets you have used before. You can find this information for each Snippet (7).