Customisation Options: Branding, Welcome & Help
Last updated: July 18, 2026
Summary
Portflow can be customised to match the institution's branding. Moreover, other customisation options include a custom welcome message for new users to introduce Portflow and a customisable help and info URL.
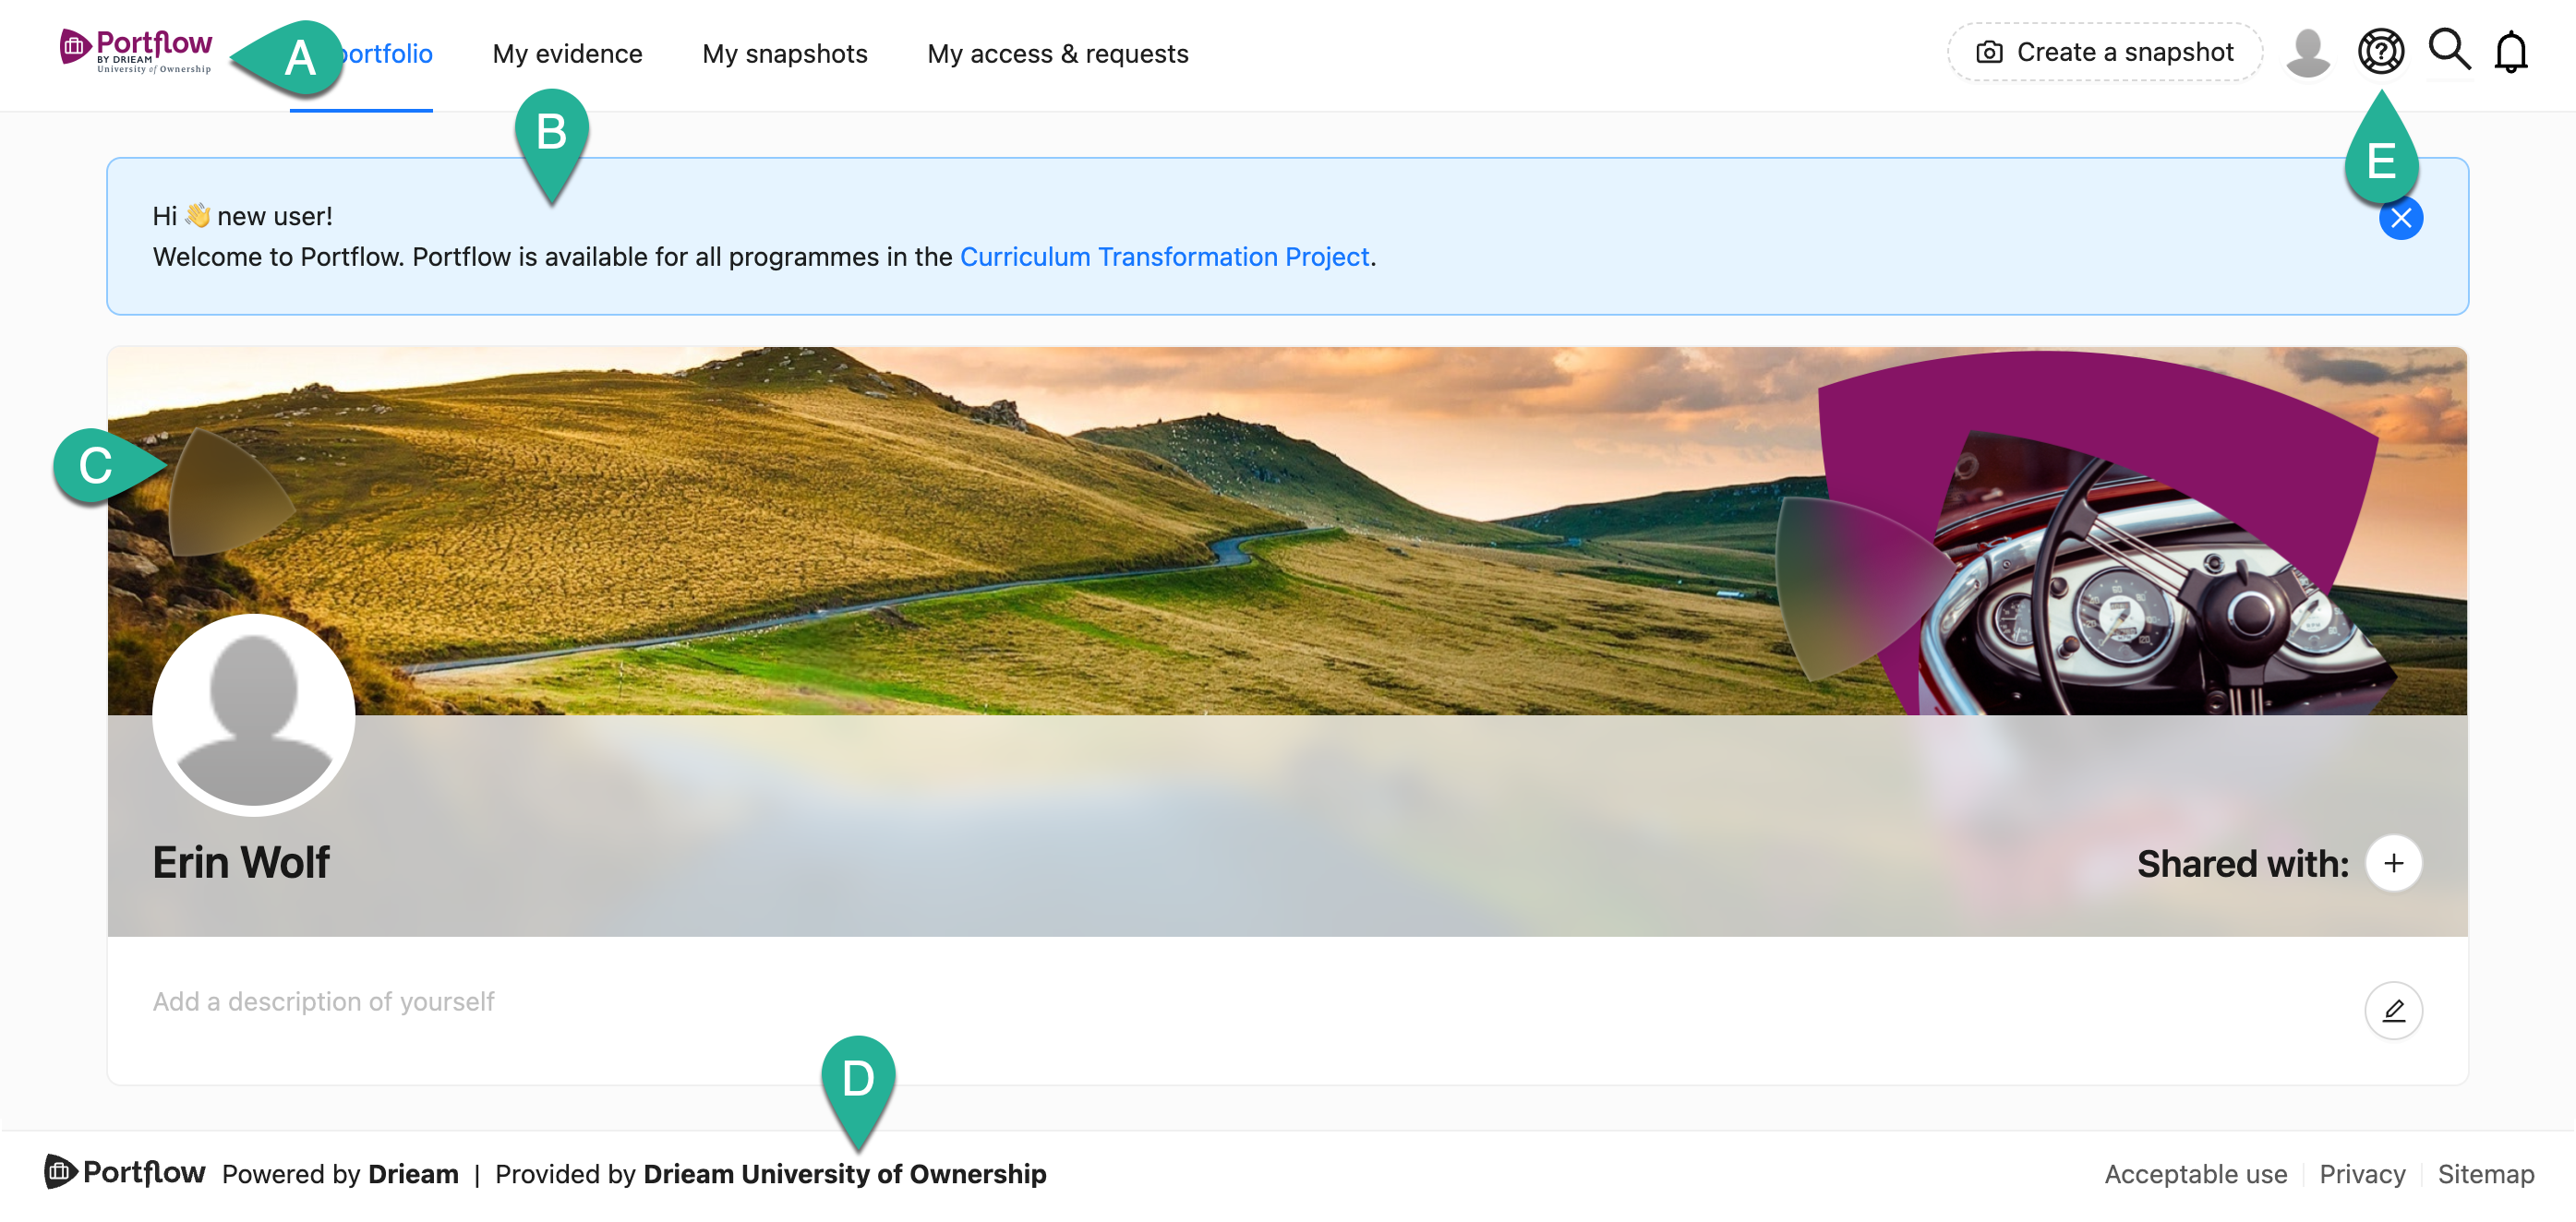
Portflow can be customised in various ways. Firstly, the header logo (A), default banner image (C) and footer text (D) can be set to match the institution's brand. Additionally, a customisable welcome message (B) can be defined to introduce Portflow for new users and explain its purpose and availability. Lastly, the institution can set a custom URL to direct their users to for help and support (E).
Note:
To set the available settings, you need to have a Super Admin or Functional Manager role. Find out more about roles in 📄 Super Admins, Power Users, and Departments.
A) How to customise the application header logo?
The application header logo defaults to the Portflow by Drieam logo, but can be replaced via the Admin Settings with another image.
Go to Admin → Settings.
Open (expand) the Alternative application logo box.
Upload a custom image for your organization with the specified dimensions.
A 4:1 ratio with a size of 400 × 100 px is recommended.
Click Save at the top or bottom of the page.
You'll need to refresh the page in order for the changes to take effect.
B) How to create an info box for new users?
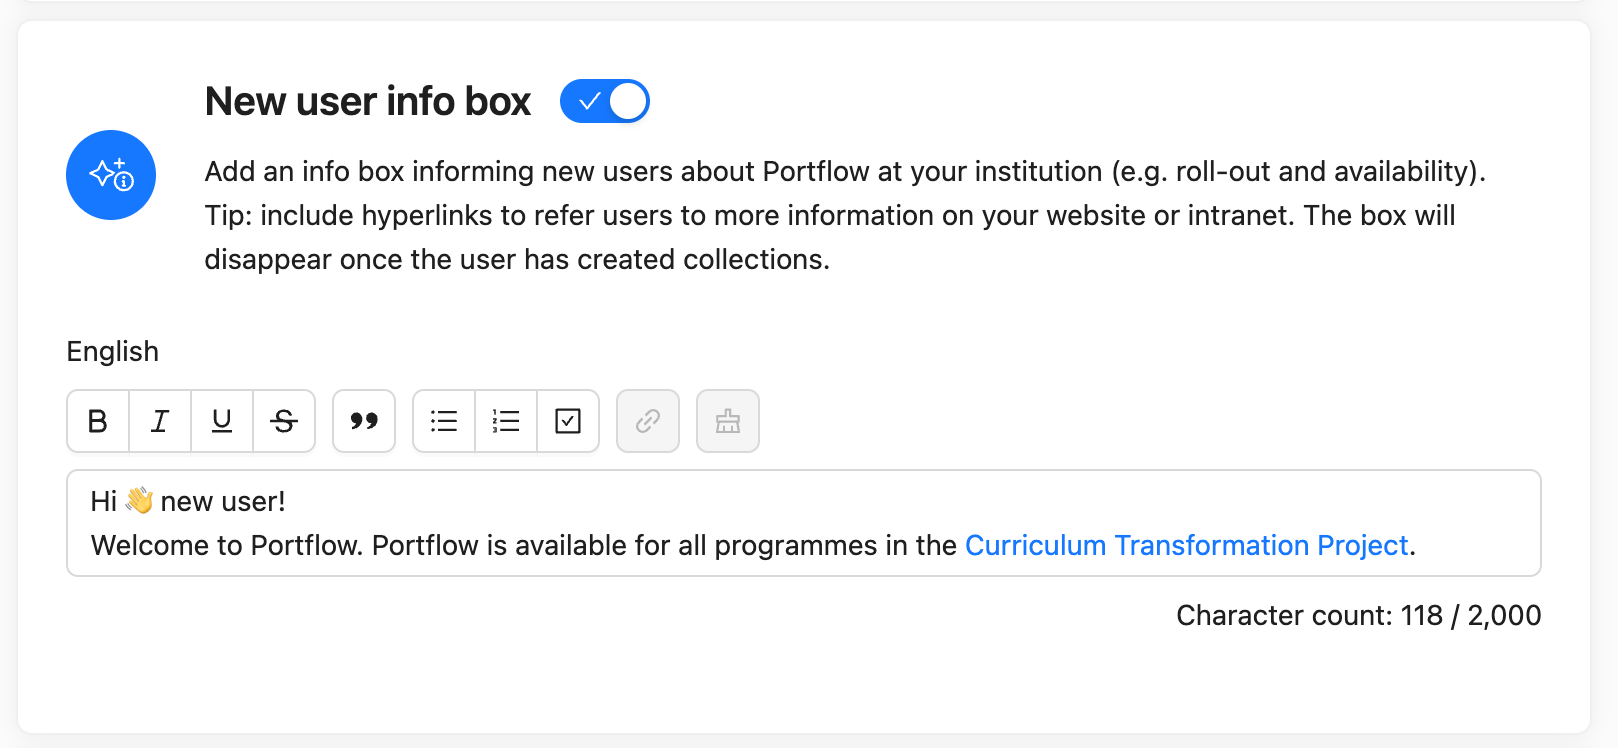
The New user info box can be set via Feature options in any of the chosen languages during the installation of Portflow. It will fall back to the default language that was set during the installation.
Go to Admin → Feature options.
Scroll down to New user info box and turn the toggle on.
Type the info that new users will see on their homepage.
Tip: Include hyperlinks to internal webpages with further information.
Click Save at the bottom of the settings page.
You'll need to refresh the page in order for the changes to take effect.
Note:
The New user info box will appear for any new user who doesn't have any collections created yet. It will automatically stop appearing once the first collection has been added to the portfolio.
C) How to customise the default banner image?
The default banner image will be displayed for all users in their portfolio. This can be replaced by the user's personally uploaded banner image. You're more than welcome to request a design by Drieam for your institution's default banner image.
Go to Admin → Settings.
Open (expand) the Default banner image box.
Upload a custom image for your institution with the specified dimensions.
For an optimal result, we recommend a resolution of 2560 × 640 pixels.
Click Save at the bottom of the settings page.
You'll need to refresh the page in order for the changes to take effect.
D) How to customise the institution's name in the footer and notification emails?
The institution's name will be displayed in Portflow's footer as well as in email notifications to external users to clarify what institution a learner is affiliated to. This name can be changed via the Admin Settings.
Go to Admin → Settings.
Open (expand) the Institution name box.
Add or update the institution name;
Click Save at the bottom of the settings page.
You'll need to refresh the page in order for the changes to take effect.
E) How to customise the help button to your institution's documentation?
By default, the Visit help and info button in the top-right corner of the Portflow header navigation will link to Portflow's knowledge base. However, some institutions prefer to direct their users to their internal documentation first. This can be set via the Feature options.
Go to Admin → Feature options.
Scroll down to Custom help button and turn the toggle on.
Enter a web page URL for each of the chosen languages during the installation of Portflow. It will fall back to the default language that was set during the installation.
Click Save at the top or bottom of the page.
You'll need to refresh the page in order for the changes to take effect.