Create a Snapshot
Last updated: August 25, 2026
Summary
To submit a Portfolio for e.g. an (interim or summative) assessment, you must first prepare a Snapshot (locked or frozen copy) of your Portfolio or part of your Portfolio. You can continue working on your live Portfolio while this Snapshot remains frozen in time.
Applicable for | 🐼 |
Not applicable for | — |
How to create a Snapshot?
As a learner, you can create a Snapshot to 'freeze' a curated selection from your Portfolio for assessment or showcasing purposes.
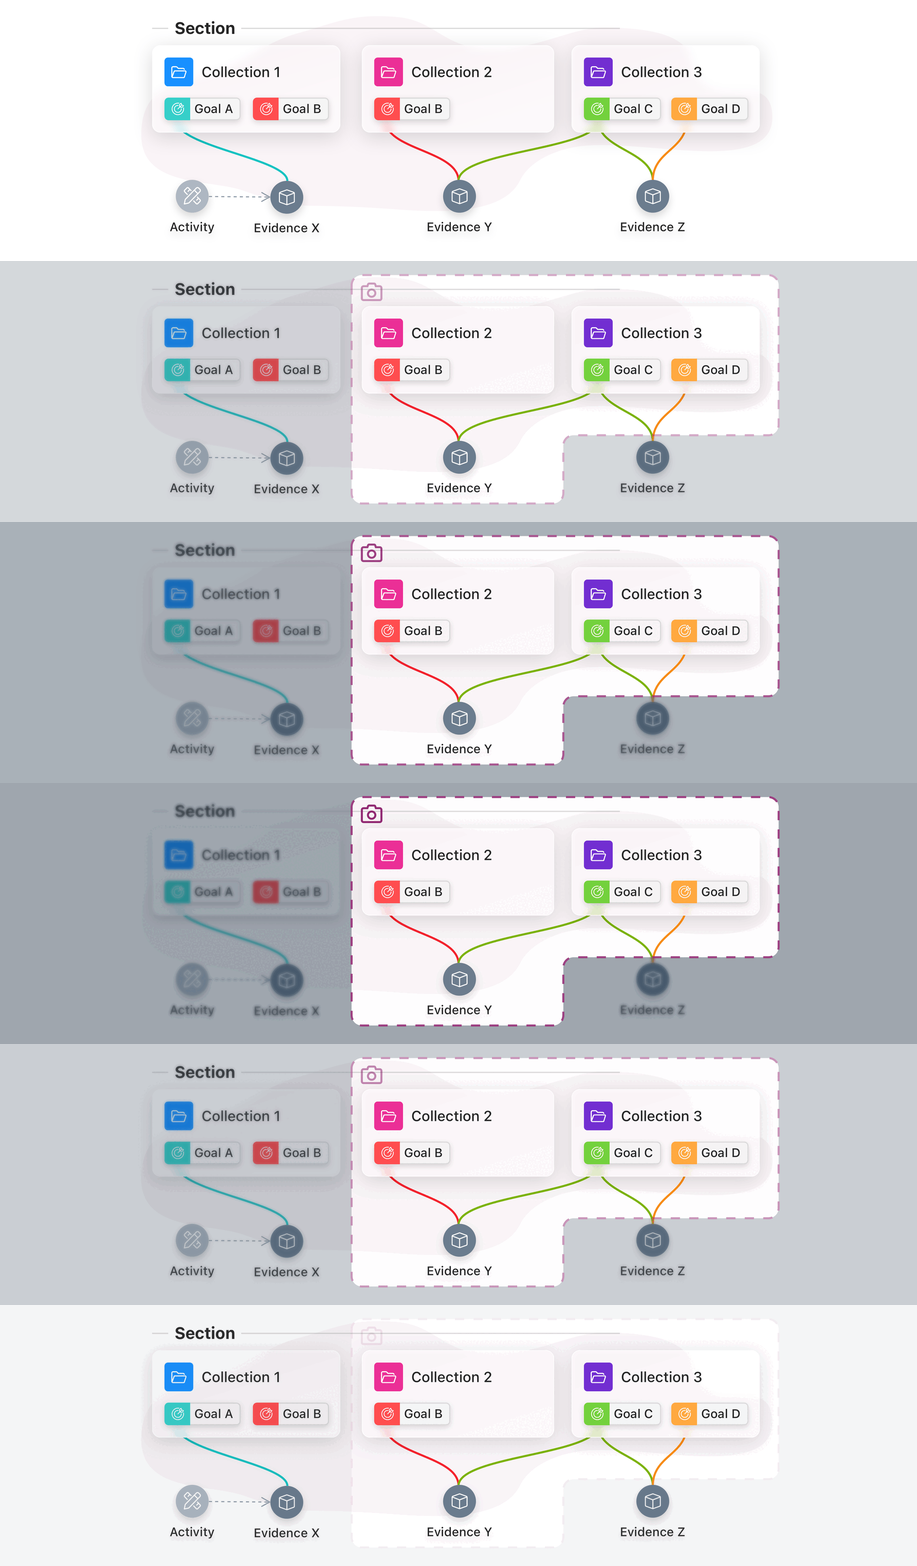
Note: Preparing a Snapshot does not mean that the Portfolio has already been submitted, this is a separate action. Learn more about submitting your Snapshot to an assignment (📄 Submit Portfolio in the LMS), or creating a public link ( 📄 Public links to Snapshots).
Click Create a Snapshot in the menu at the top right to start the Snapshot creation process.
You can choose whether you want to follow a ‘Goal-based’ or ‘Collection-based’ flow: The difference is in the process of creating the Snapshot. In both flows, you can create the same Snapshot, with the same components (Collections, Goals, and Evidences).
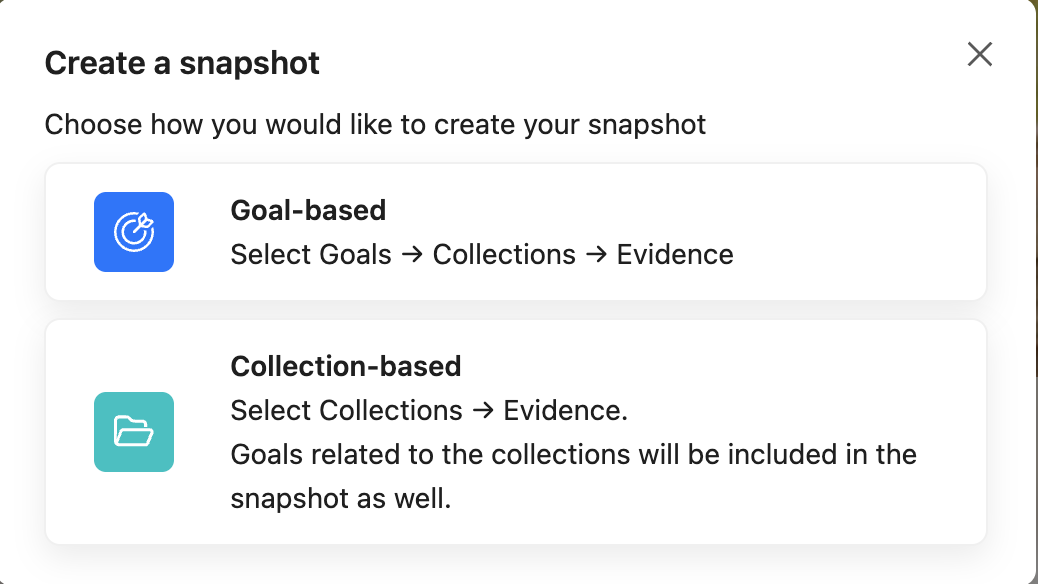
Step 1-3 in Snapshot process: Follow the steps from either Goal-based or Collection-based Snapshot flow:
🎯 Goals → 📁 Collections → 📦 Evidence (Goal-based flow)
📁 Collections → 📦 Evidence → 🎯 Goals (Collection-based flow)
For more details of these steps, please view the corresponding chapter below.
Note: You cannot select which Activities are included in the Snapshot. All Activities of a selected Collection are included in the Snapshot.
Step 4 in Snapshot process: Optionally, enter a Name and Description for this Snapshot. For a final check, view the number of components (Evidences, Collections, and Goals) that will be included in this Snapshot. Then click Save to save the Snapshot.
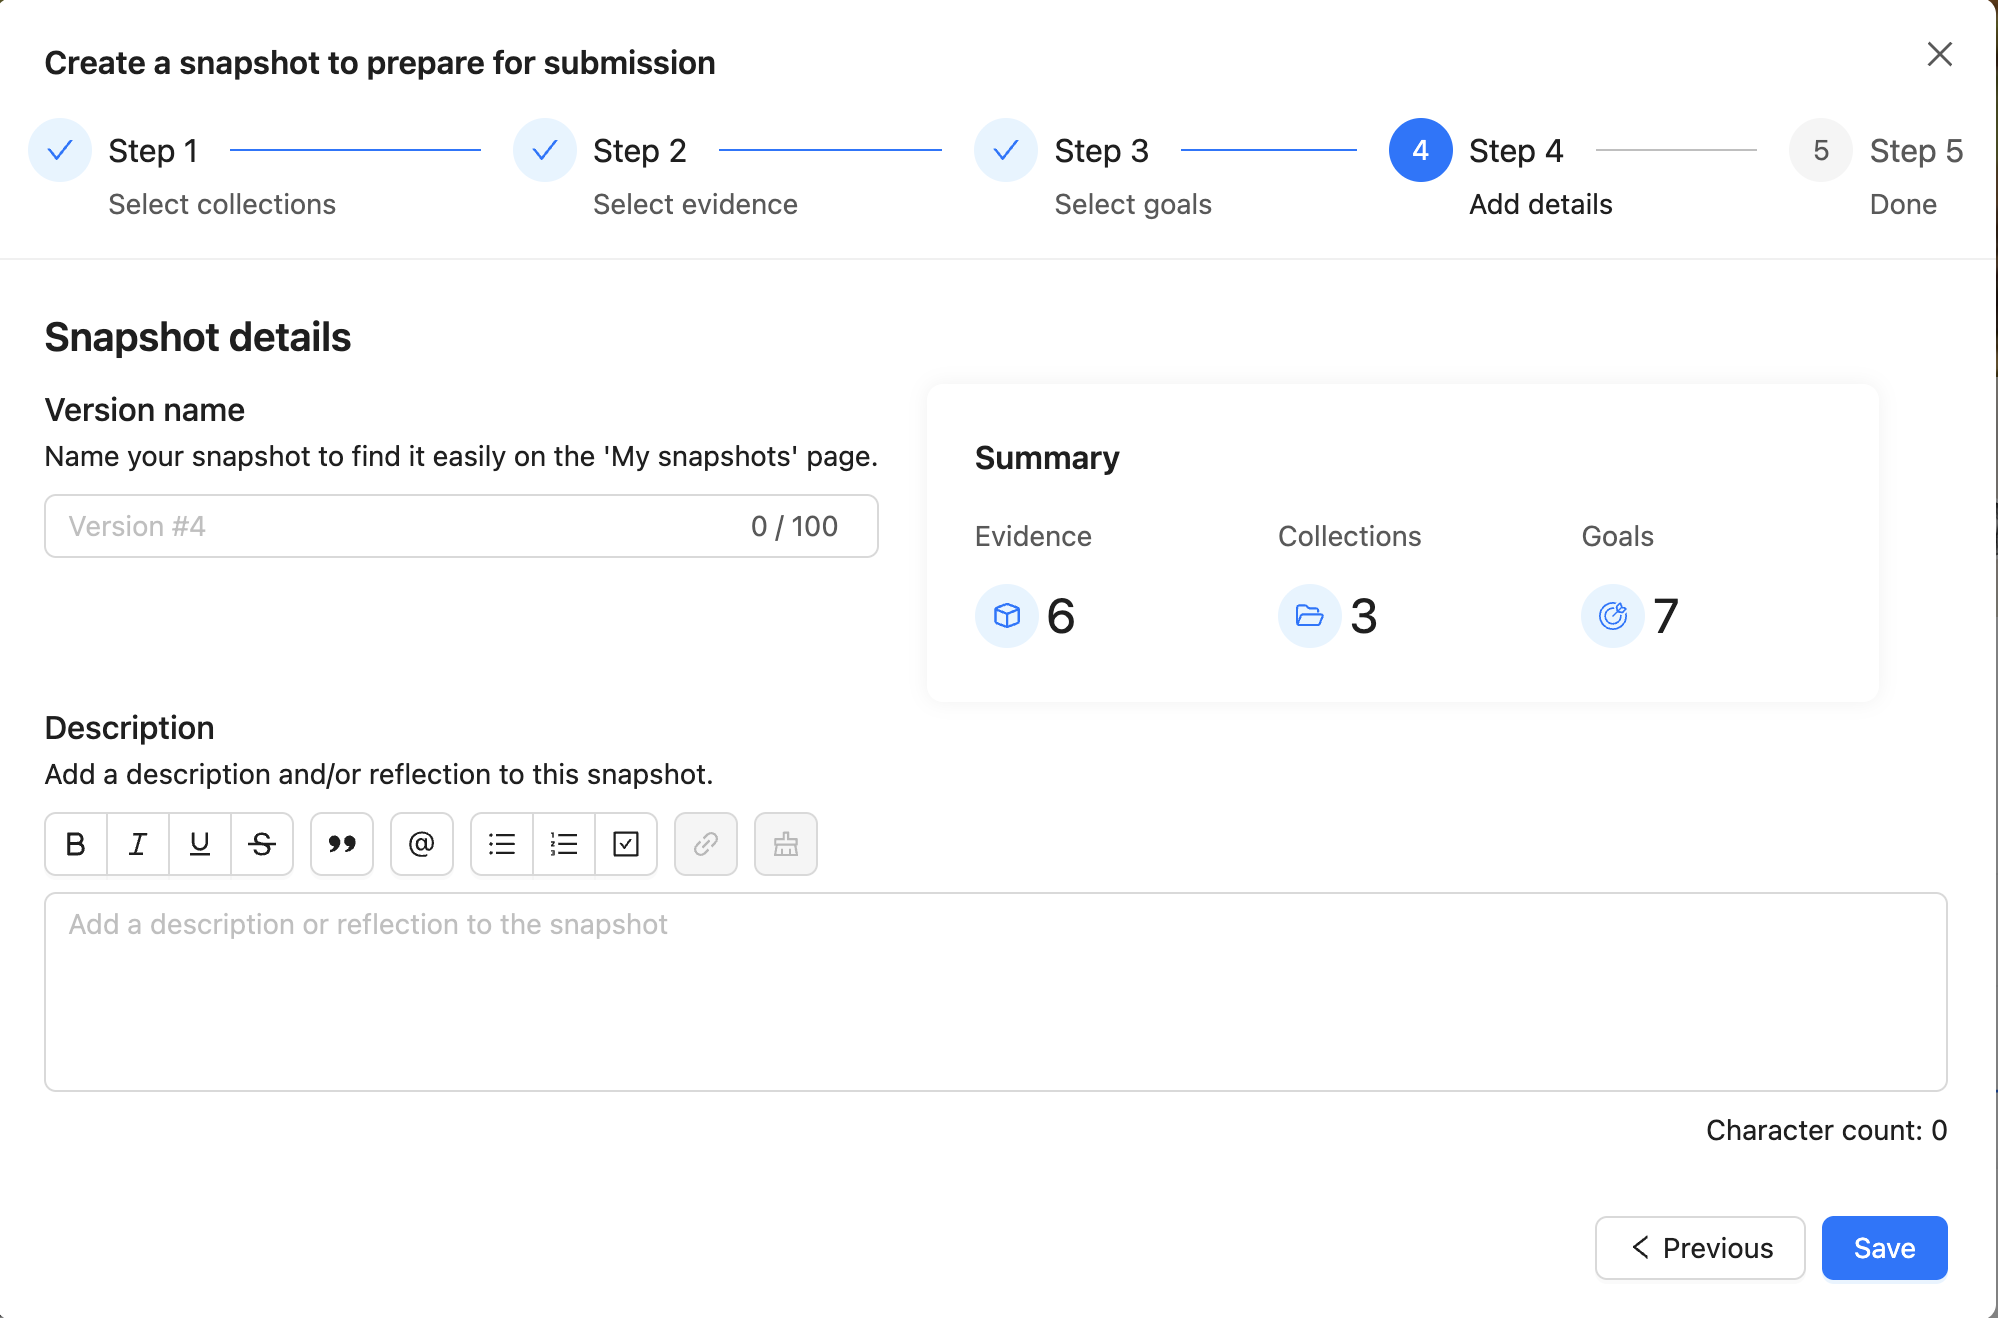
Step 5: Click View your Snapshots to view the created Snapshot.
It might take a few minutes for the Snapshot creation to finish, depending on the size of the Snapshot.
Note: Snapshots can no longer be edited.
How to create a Snapshot based on Collections?
💡 The Collection-based flow is similar to the ‘old’ Snapshot flow.
When to choose this flow: For example, if Collections represent your courses, and you wish to create a Snapshot for assessment of the courses in this semester. You do not necessarily have to include all Evidences and Goals from these Collections in the Snapshot.
📁 Choose Collections
Selection: You can select individual Collections, or multi-select all Collections within a Section.
Information: To help you select the correct Collection, you can check the number of Goals and Evidences that are linked to this Collection and the template this Collection was imported from.
Filters: You can use filters for linked Goal(s), or imported from Template. Collections that fit all filters will be displayed.
Counter: At the bottom right, you can see how many Collections you have selected.
📦 Choose Evidences
Default selection: All Evidences within these Collections are selected by default. If you wish, you can unselect any Evidence.
Information: To help you select the correct Evidences, you can check the linked (Sub-)Goals, date of the latest Version, the Evidence type, and the template the corresponding Activity was imported from.
Filters: You can use filters for linked Goals, or imported from Template.
Counter: At the bottom right, you can see how many Evidences you have selected.
🎯 Choose Goals
Default selection: All Goals that are linked to the selected Collections are selected by default, and are displayed at the top of the table. If you wish, you can unselect them. This does not affect the Collection and Evidence selection.
Information: To help you select the correct Goals, you can check the associated Goal Set, number of linked Evidences, and the template(s) this Goal was imported from.
Filters: You can use filters for status, Goal Set or imported from Template. Goals that fit all filters will be displayed.
Counter: At the bottom right, you can see how many Goals you have selected.
Optionally, enter a Name and Description for this Snapshot. For a final check, review the number of components that will be included in this Snapshot. Then click Save to save the Snapshot.
Note: If you go back in the process to change the selection in a previous step, your selection in a further step will not be retained.
How to create a Snapshot based on Goals?
When to choose this flow: For example, if Goals represent learning outcomes, and you wish to create a Snapshot (for assessment) of your progress related to these learning outcomes. You do not necessarily have to include all Evidences and Collections related to these Goals.
🎯 Choose Goals
Information: To help you select the correct Goals, you can check the associated Goal Set, number of linked Evidences, and the Template(s) this Goal was imported from.
Filters: You can use filters for status, Goal Set or imported from Template. Goals that fit all filters will be displayed.
Counter: At the bottom right, you can see how many Goals you have selected.
📁 Choose Collections
Default selection: By default, the Collections that are linked to the selected Goals will be selected, and the selected Goals will be applied as a filter. You can (un)select individual Collections, or multi-select all Collections within a Section.
Information: To help you select the correct Collection, you can check the number of Goals and Evidences that are linked to this Collection, and the template this Collection was imported from.
Filter: You can use filters for linked Goals, or imported from Template. Collections that fit all filters will be displayed. By default, the linked Goals filter is applied, but can be removed. Removing a filter retains the selection.
Counter: At the bottom right, you can see how many Collections you have selected.
📦 Choose Evidences
Default selection: All Evidences that are both linked to a selected Collection AND to a selected Goal, are selected by default and the selected Goals will be applied as a filter. If you wish, you can unselect any Evidence.
Information: To help you select the correct Evidences, you can check the linked (Sub-)Goals, date of the latest Version, the Evidence type, and the template the corresponding Activity was imported from.
Filters: You can use filters for linked Goals or imported from Template. Removing a filter retains the selection.
Counter: At the bottom right, you can see how many Evidences you have selected.
Optionally, enter a Name and Description for this Snapshot. For a final check, review the number of components that will be included in this Snapshot. Then click Save to save your Snapshot.
Note: If you go back in the process to change the selection in a previous step, your selection in a further step will not be retained.
How do I view my Snapshots?
Captured Snapshots can be viewed under My snapshots. These copied versions of your Portfolio are no longer editable. If you want to change something in a Snapshot, you will have to create a new Snapshot.
What will be included in the Snapshot?
Selected Collections
Name
Subtitle
Description
Activities
Collection Feedback
Linked Goals
Selected Evidences
Linked Collections (from the included Collections)
Linked Goals (from the included Goals)
Feedback
Selected Goals
On the Goal card, you can see the Feedback and Evidence you can view elsewhere in the Snapshot.
Progress Review results
On the Goals that were included in the Snapshot
How can I delete a Snapshot?
If your Snapshot is not yet submitted
If the learner has not submitted their Snapshot in an (LMS) assignment or a grading tool, and this Snapshot has no public links, the learner can delete this Snapshot. To do so, go to the My Snapshots page, click the Action menu (︙), and select Delete this Snapshot.
If your Snapshot is already submitted
If the learner has already submitted their Snapshot in an LMS assignment or grading tool, or if the Snapshot has an Assessment link, the Snapshot can only be deleted by an Admin of the institution. Learners can revoke a showcase link which will allow for deletion of the Snapshot.
To get an Assessment Snapshot deleted as as a learner, you need to request deletion of your Snapshot with your teacher or institution Admin. Provide the Snapshot ID of the Snapshot that needs to be deleted.
Go to the My Snapshots page
Click the Action menu (︙) and select Delete this snapshot.
You will see a pop-up with the ID of this Snapshot. Copy the Snapshot ID.
Send this ID to your teacher or Admin.
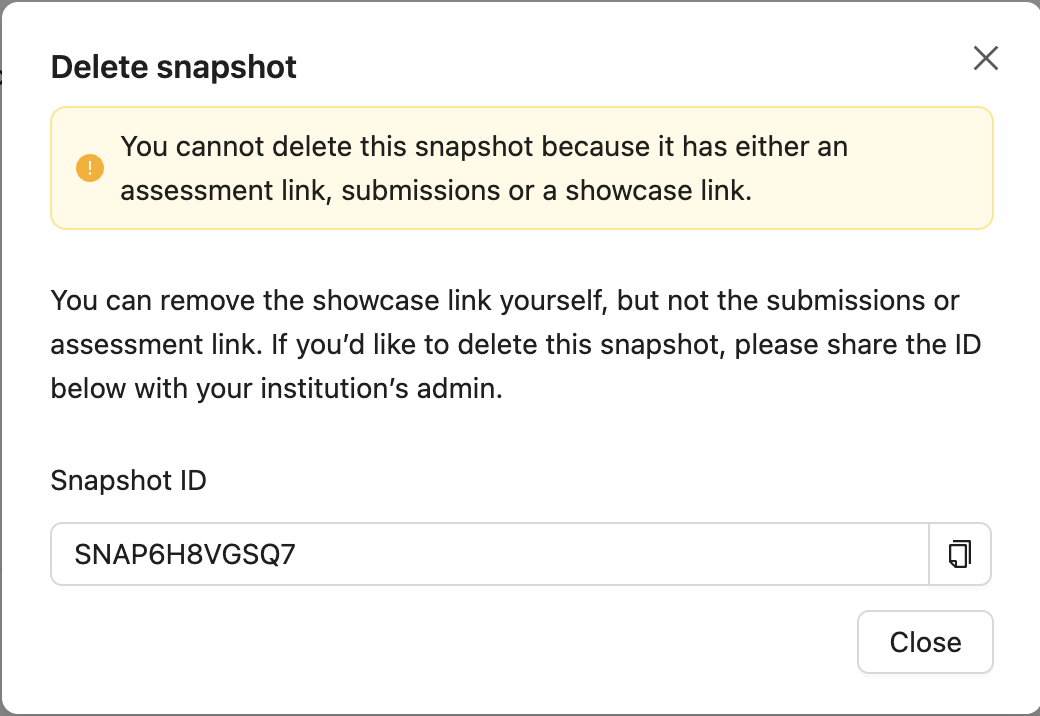
Warning: Deleting a Snapshot is a permanent action and cannot be undone.